Introducing Design Studio: Creating and Customising Product Templates
We have completely upgraded our old template builder into a comprehensive, fully functional Design Studio. Integrated directly into your dashboard, the Design Studio acts as a built-in canvas creator where you can lay out text, combine multiple images, and draw custom shapes—all tailored flawlessly to our production specifications.
The artboard canvas inside the Design Studio matches the exact high-resolution physical dimensions of the item you are printing. This completely removes the guesswork out of sizing, margins, and DPI.
How to use the Design Studio: Step-by-Step
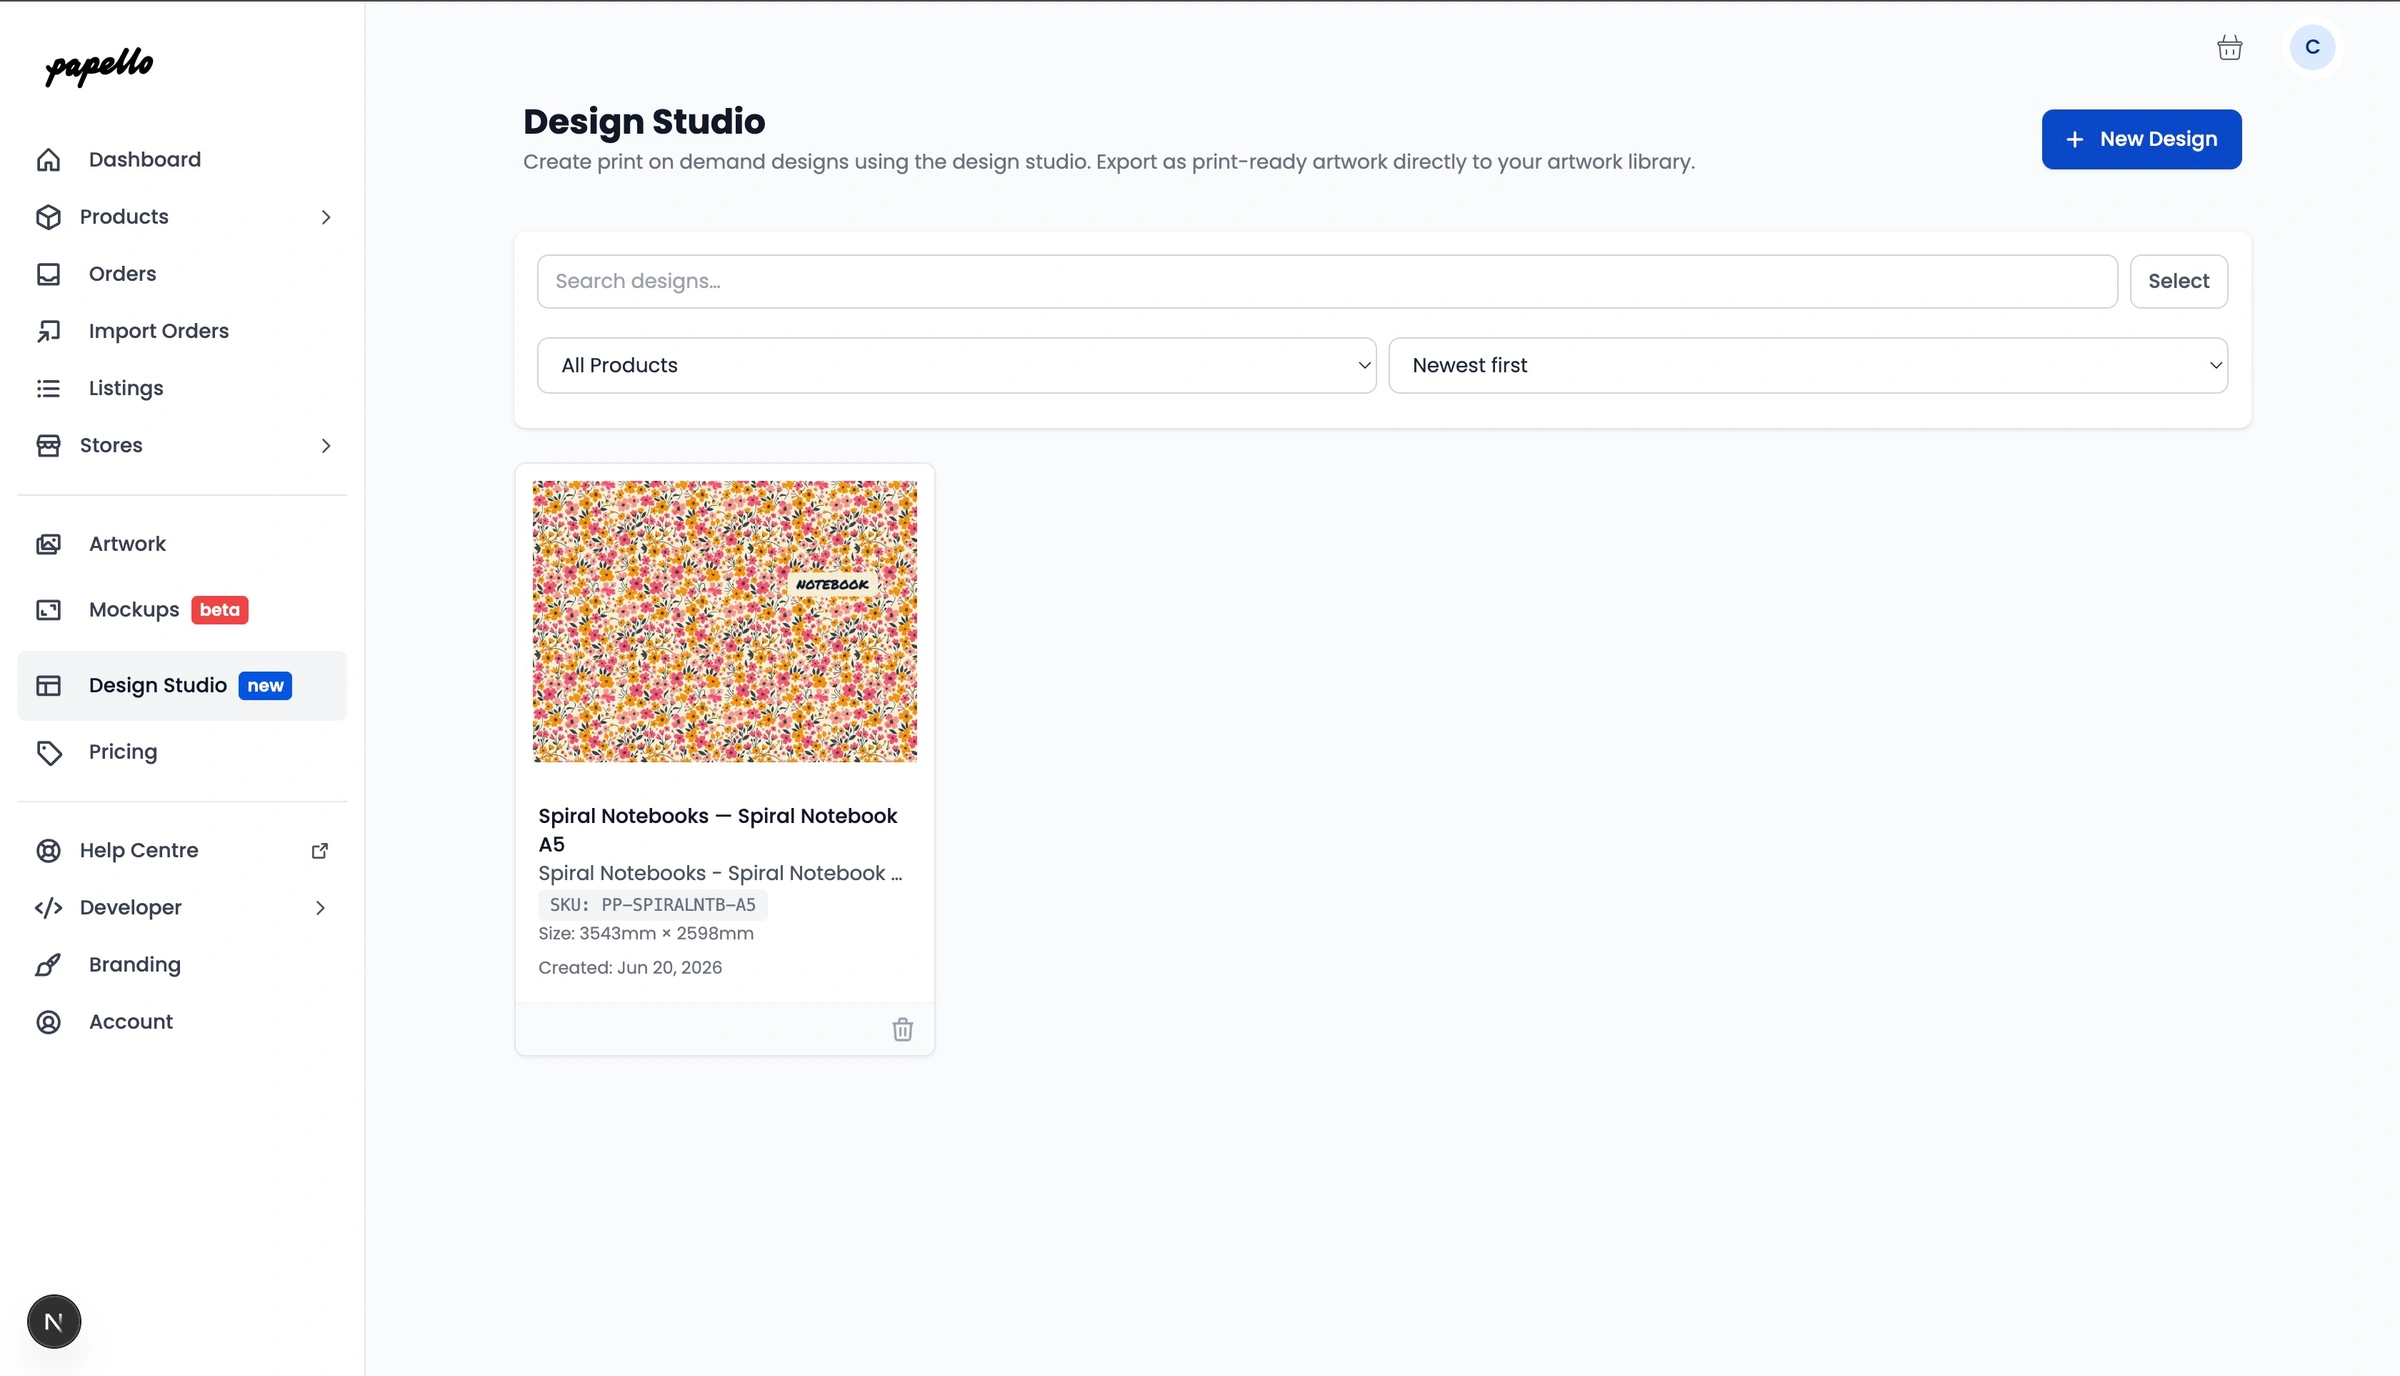
Step 1: Access the Studio
From the left-hand navigation sidebar on your dashboard, select "Design Studio".
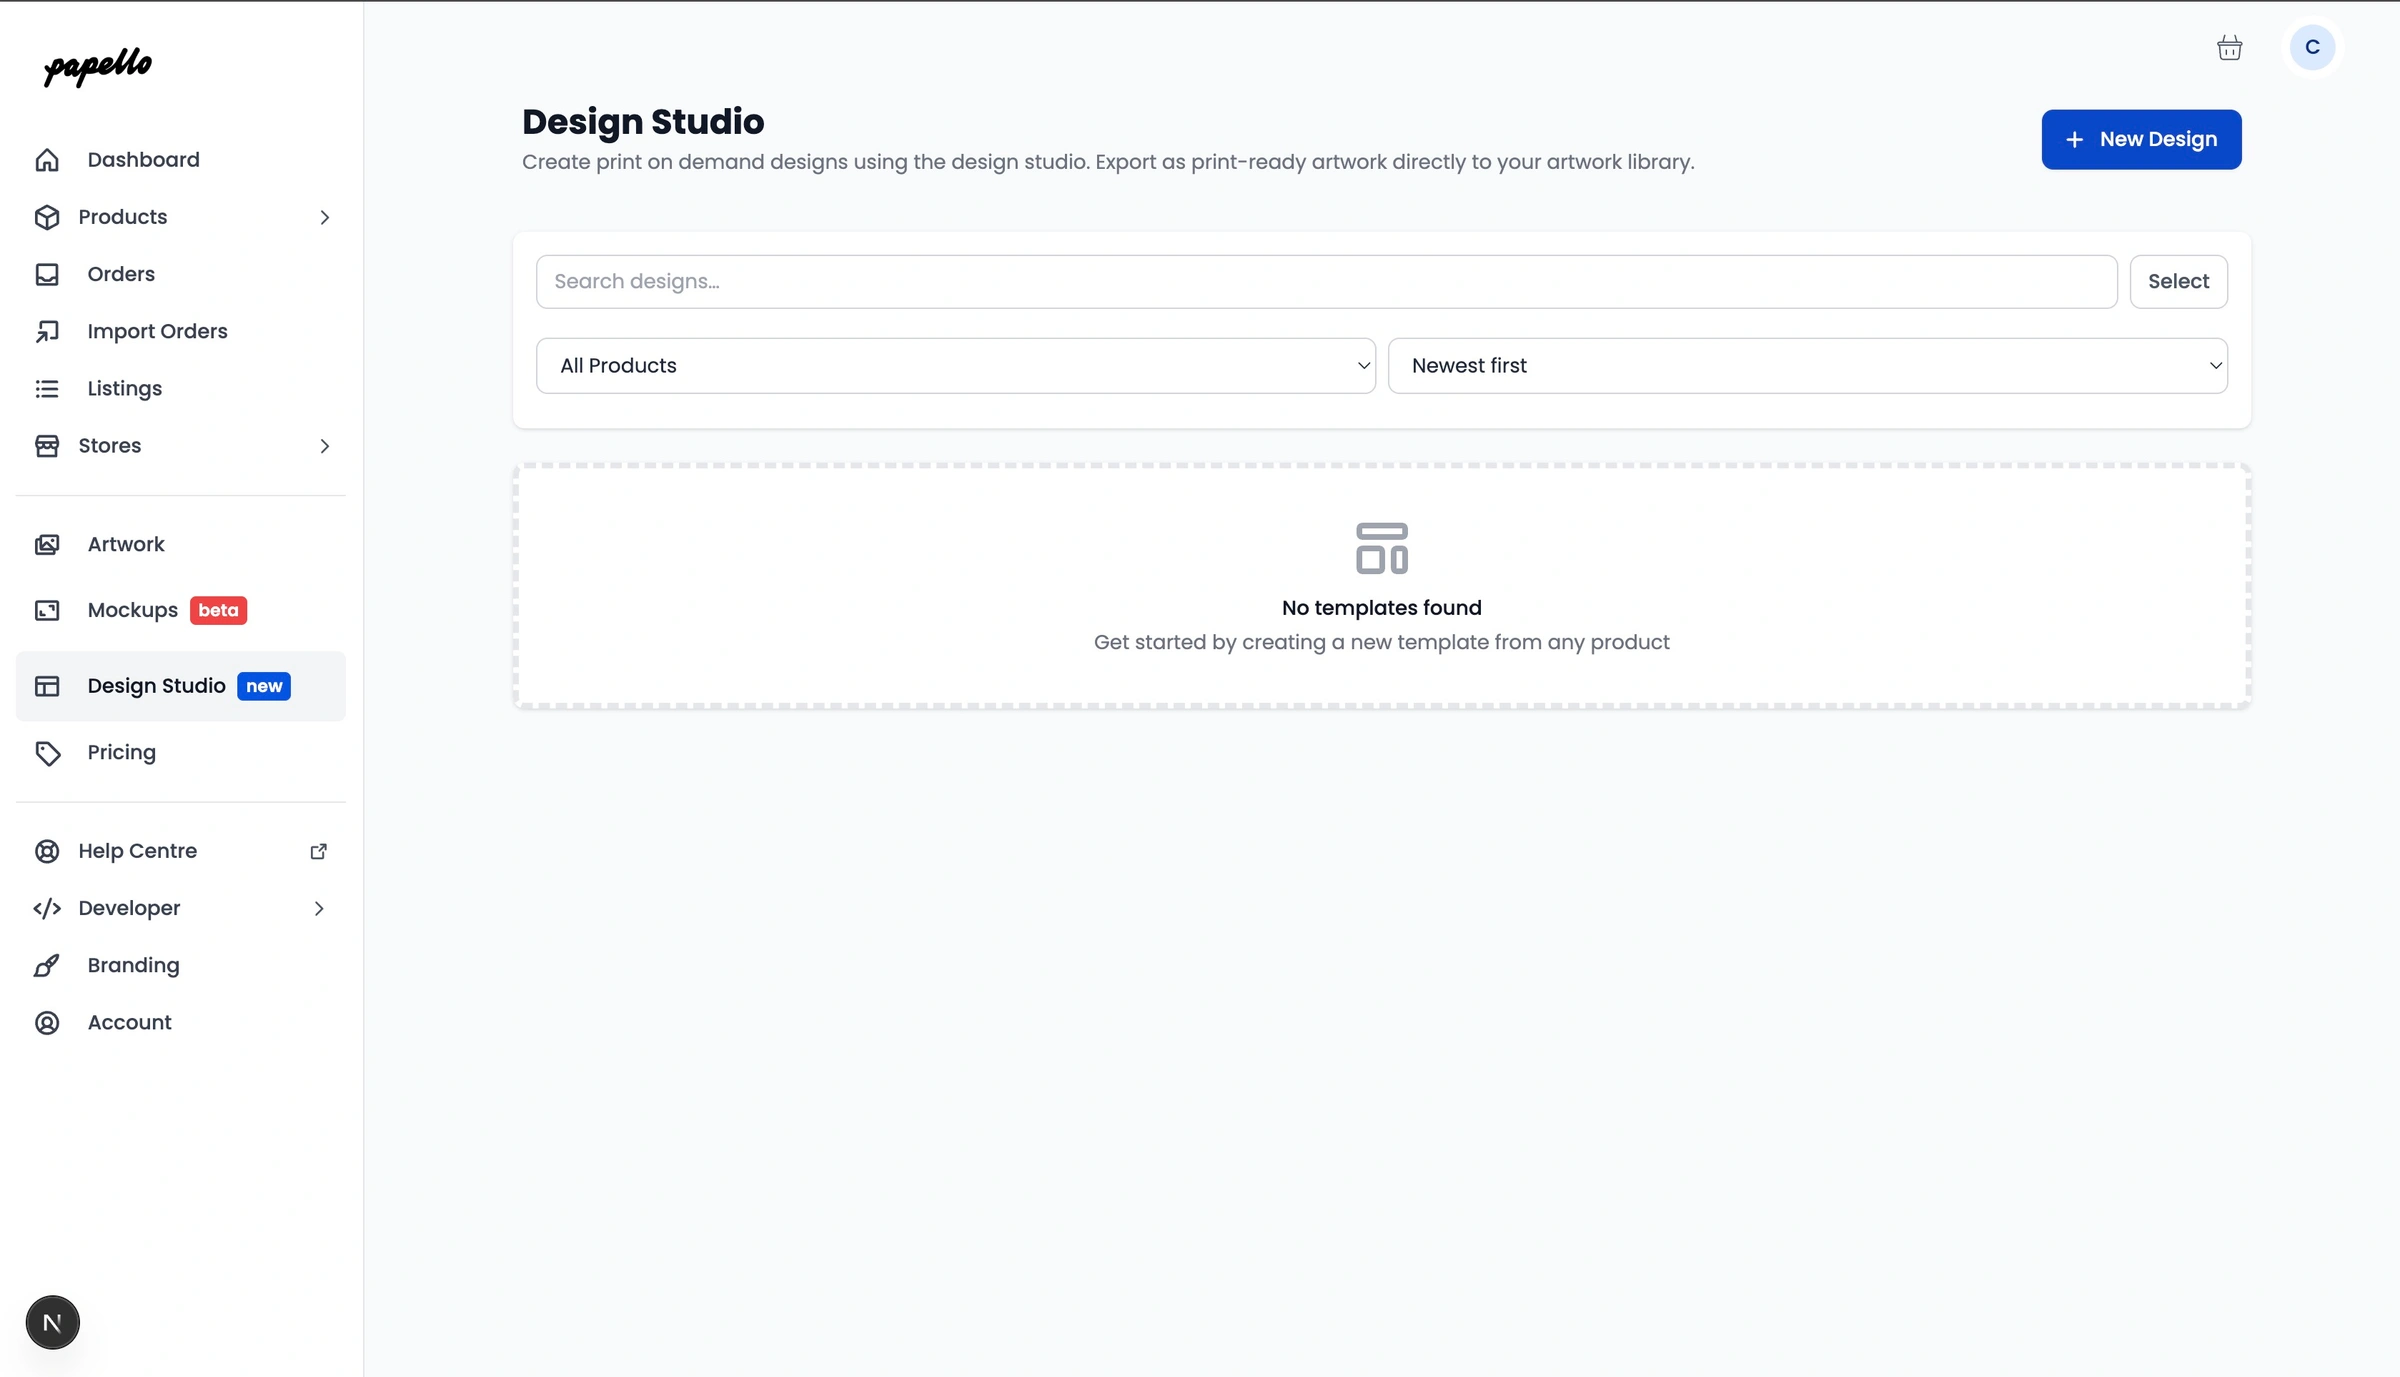
Step 2: Start your Project
You will be given the option to choose from an existing template you've already started, or to create a brand new one from scratch.
Step 3: Choose a Base Product
Click "New Design". This opens our product catalogue modal window. Browse and pick the product type you intend to create (for example, a Spiral Notebook).

Once selected, the design editor workspace will launch with an artboard perfectly proportioned to that product’s precise printing area.
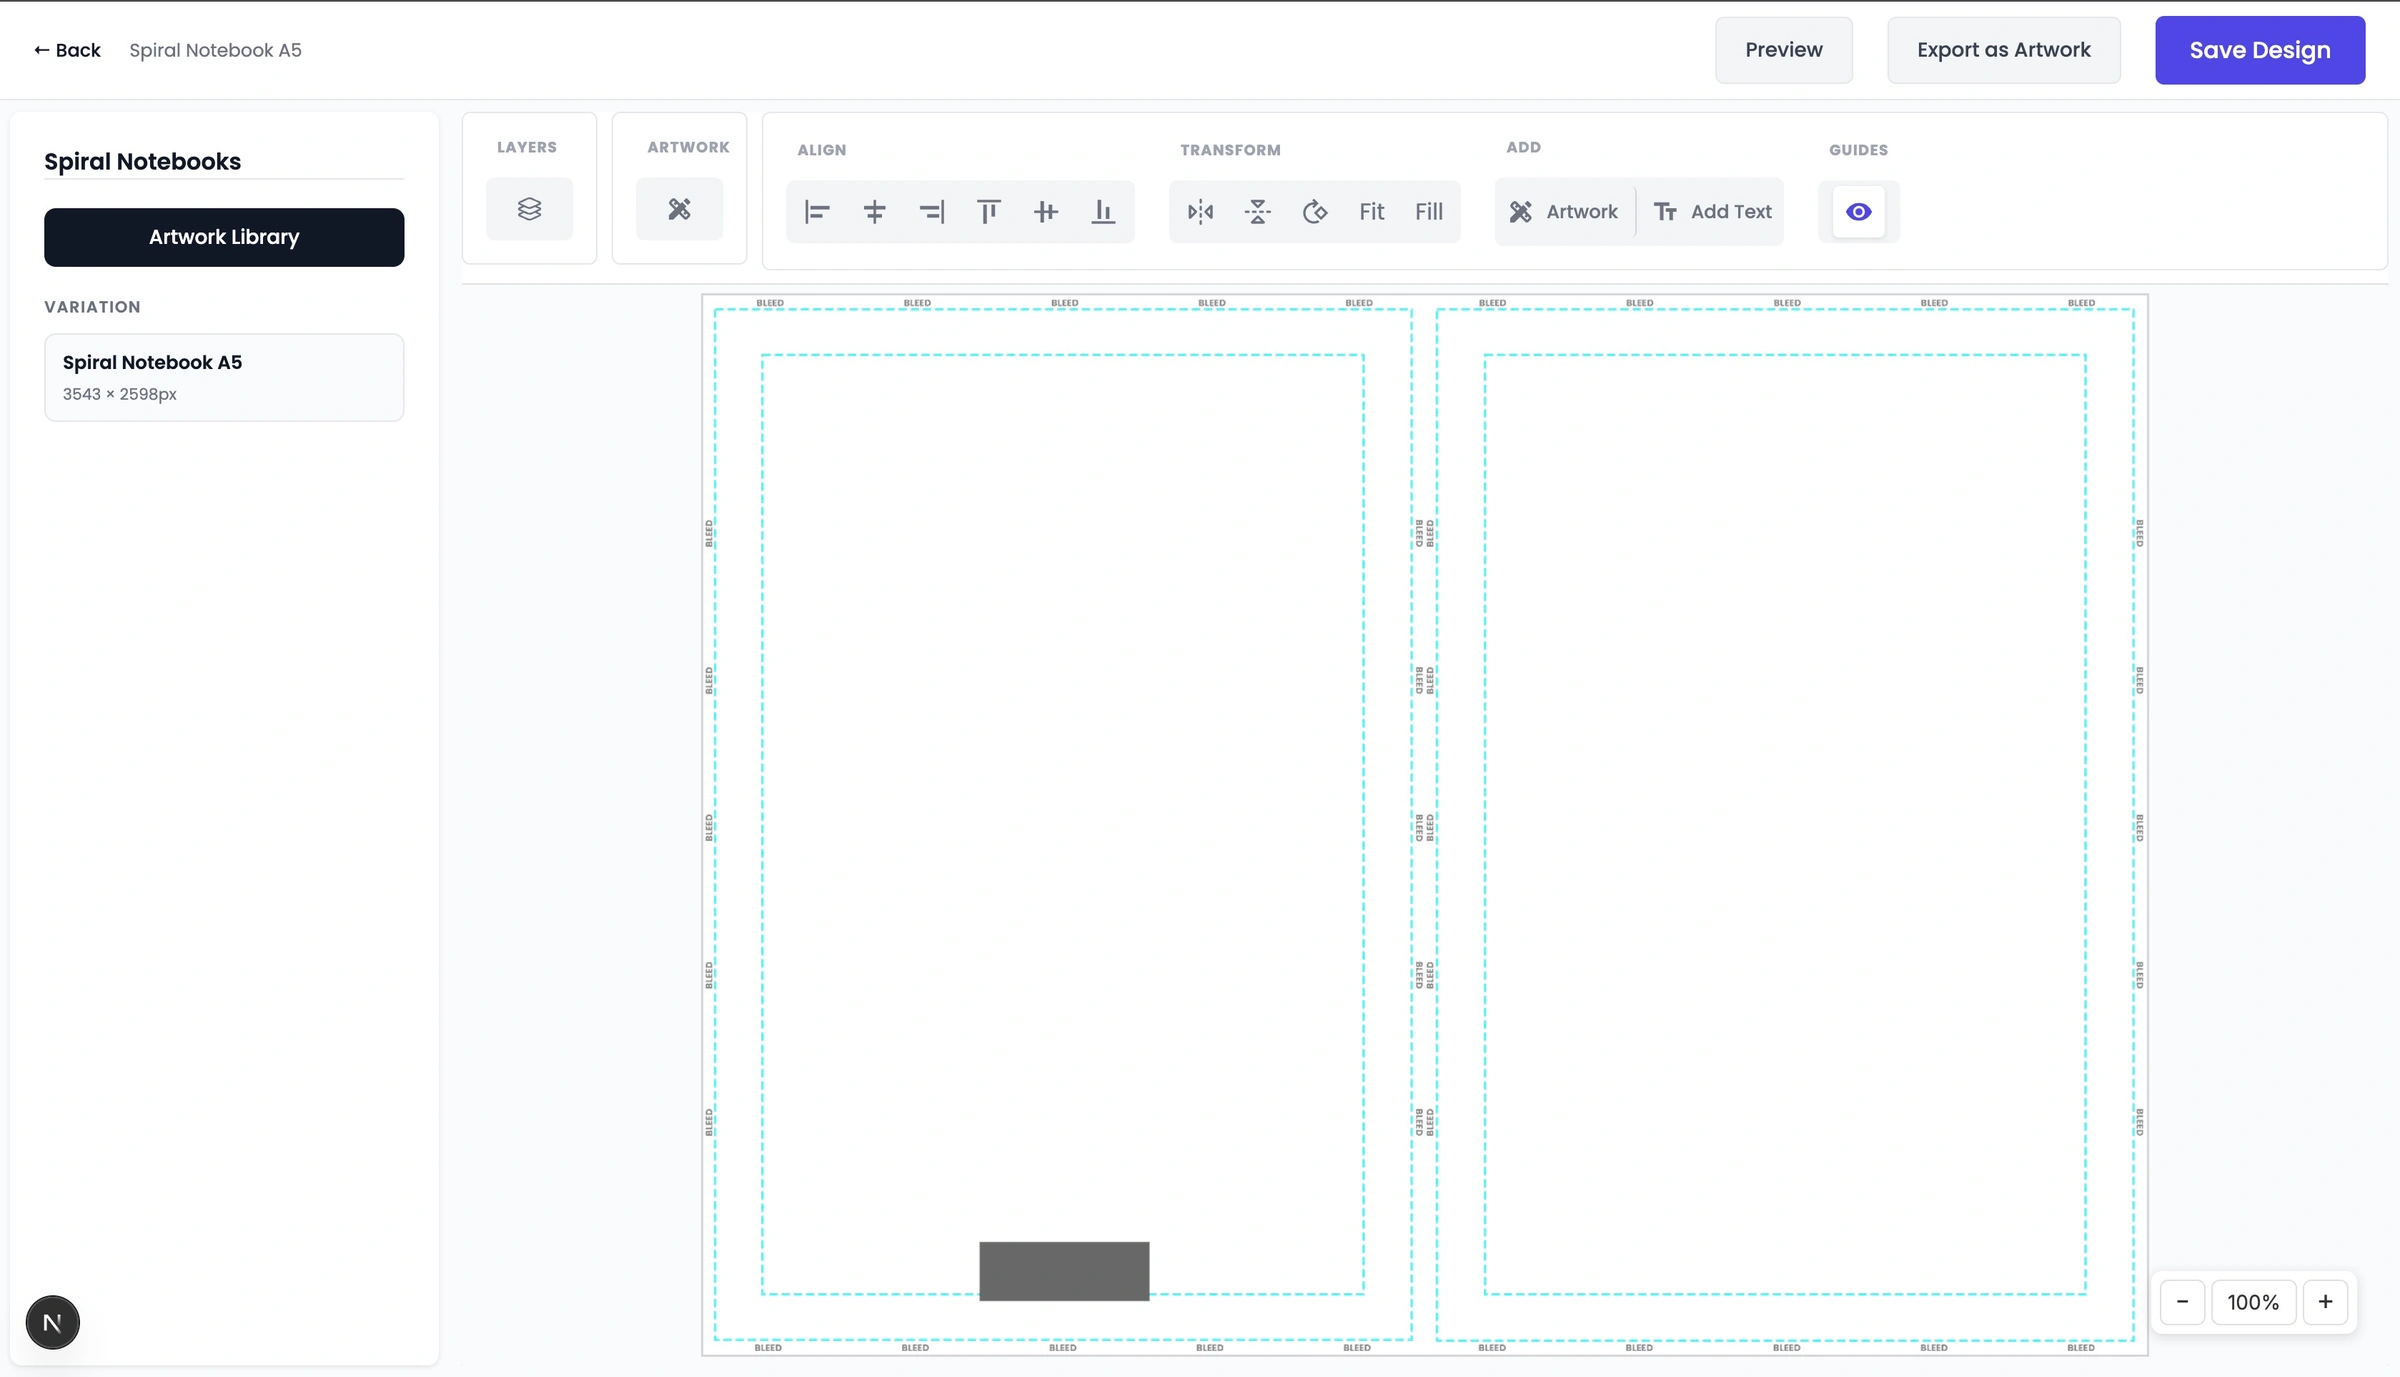
Step 4: Layer and Manipulate Artwork
You can insert graphics and assets straight from your Artwork Library. Once placed on the canvas, you can freely:

Resize, rotate, scale, and stretch.
Use "Fit" or "Fill" buttons for automated alignment.
Use the positioning tools to snap elements to the center or edges.
Flip images horizontally or vertically.
Combine and layer multiple distinct images on a single canvas.
Step 5: Draw and Style Vector Shapes
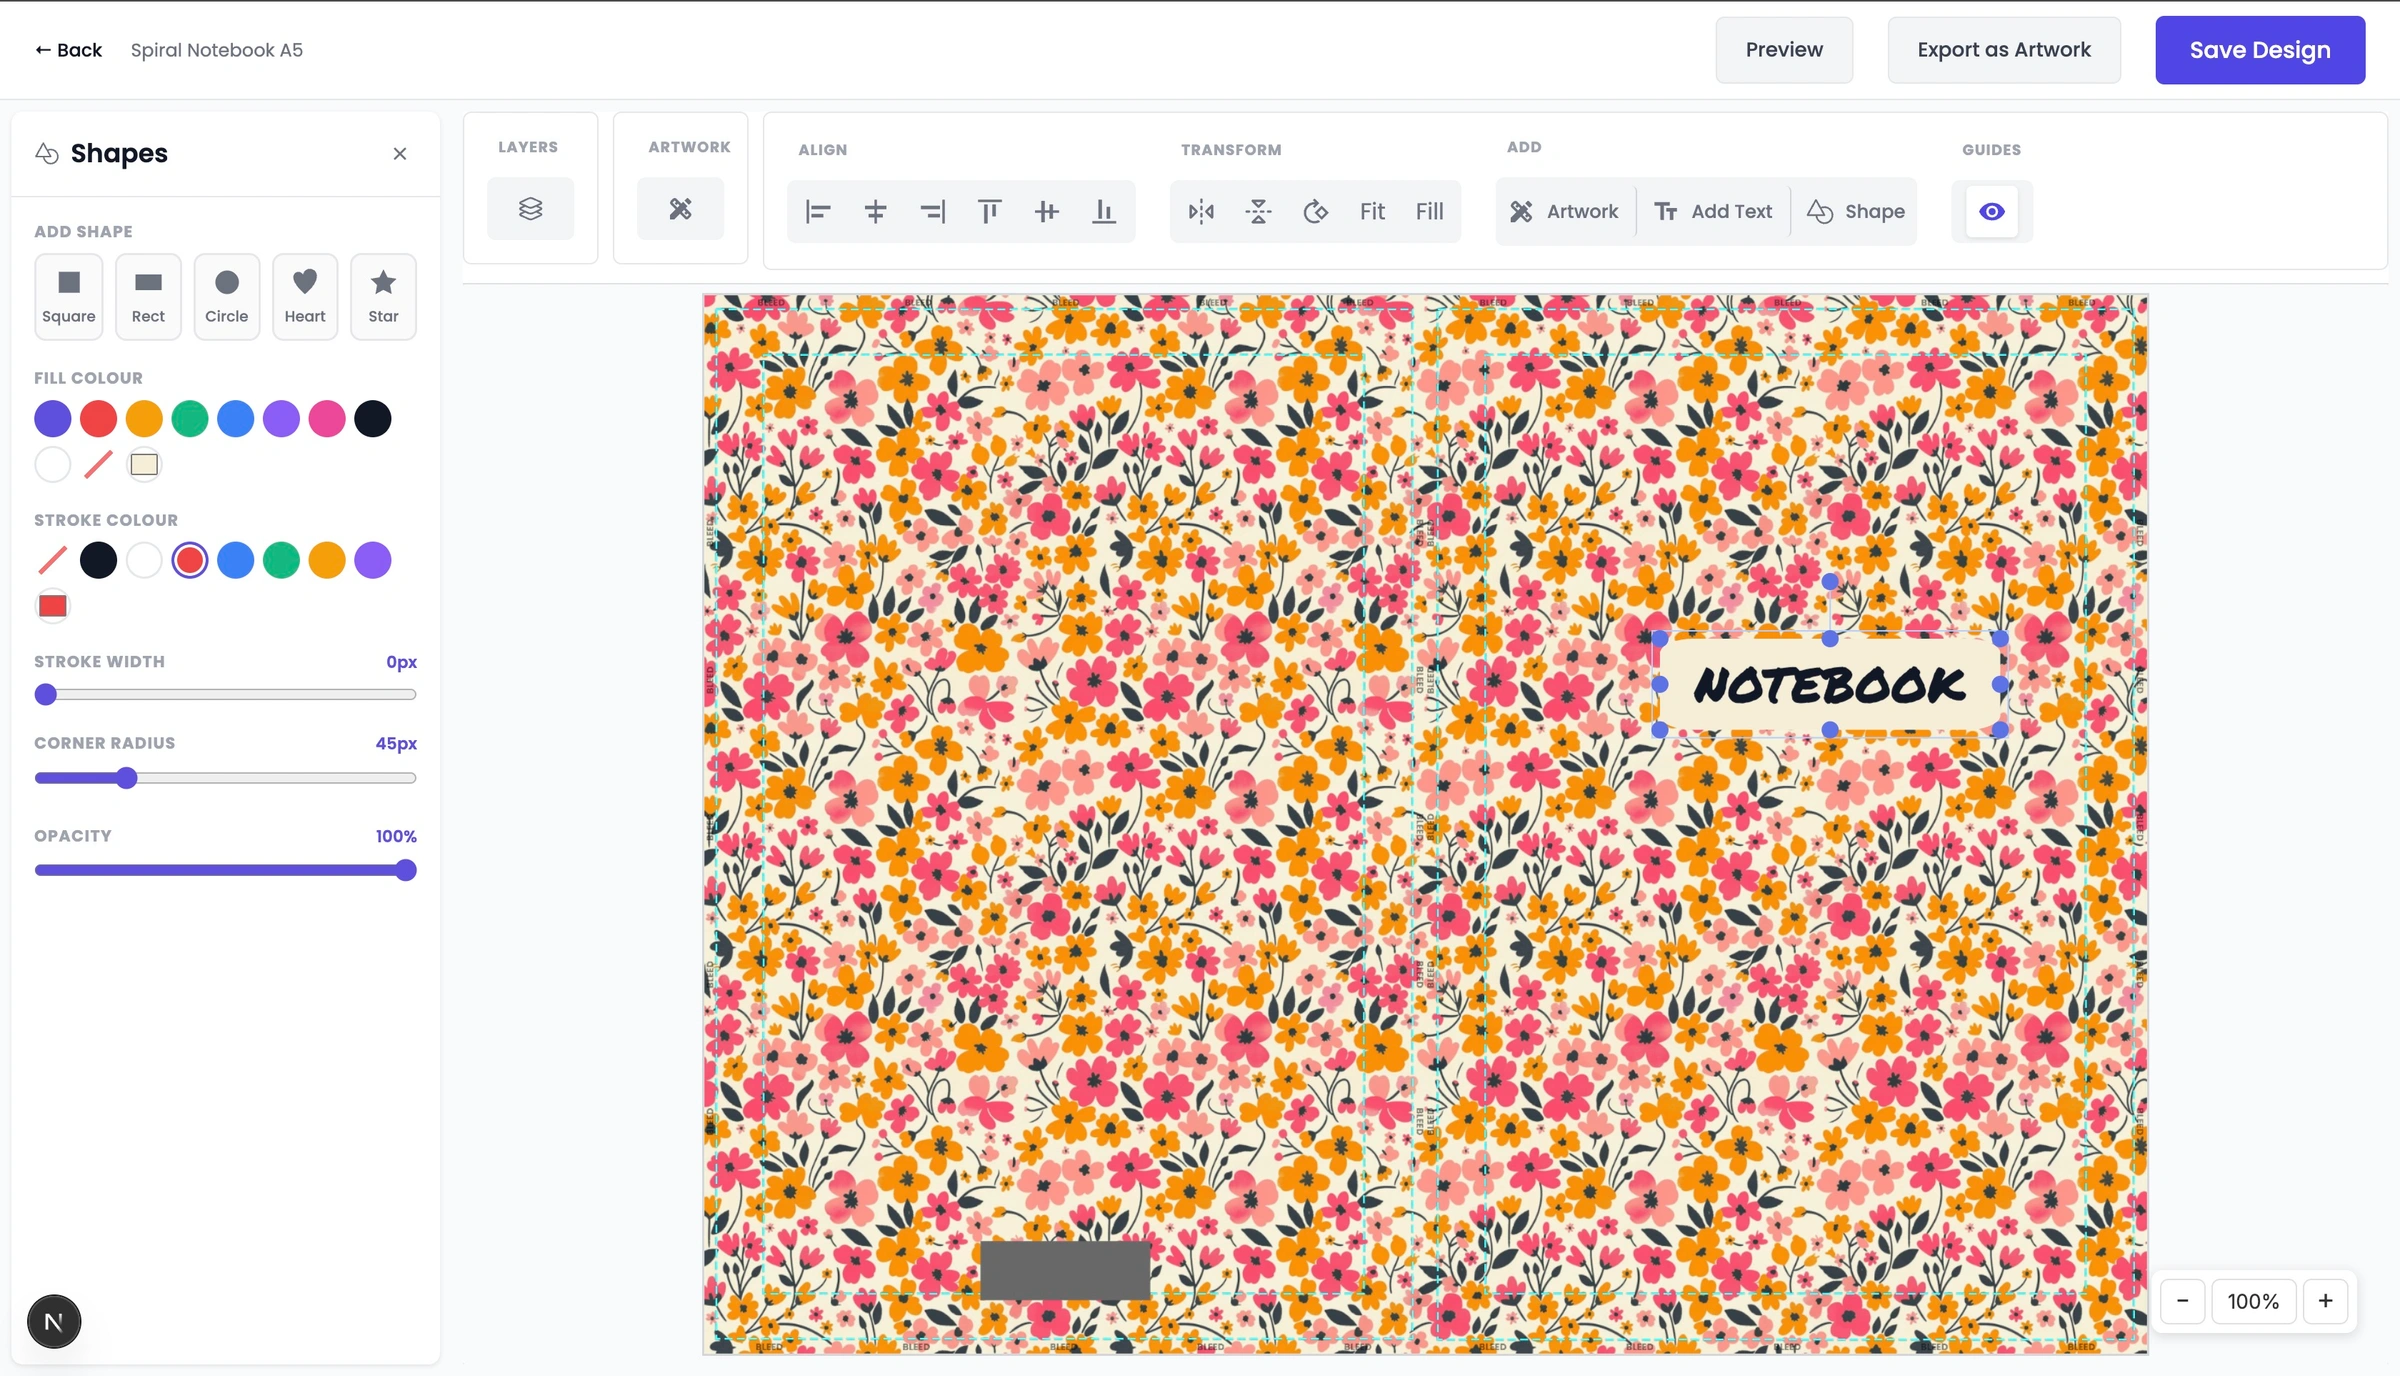
Enhance your layout using our built-in geometric Shapes Tool. You can add a variety of shapes to your canvas and customize them with precision using these advanced editing features:
Fill Color: Choose a solid background color to fill the body of the shape.
Stroke & Border: Customize the outer outline with separate Stroke Color controls and a Stroke Width slider to make lines as thick or thin as you need.
Rounded Corners: Use the corner radius tool to soften sharp edges, transforming standard rectangles into smooth, rounded shapes.
Transparency / Opacity: Adjust the transparency slider to fade shapes or create beautiful layered overlay effects.
Step 6: Add and Style Typography

Click the text tool to type directly onto your design. You can select from a wide variety of professional fonts, shift text alignments, adjust paragraphs, change colours, or tweak structural typographic styles.
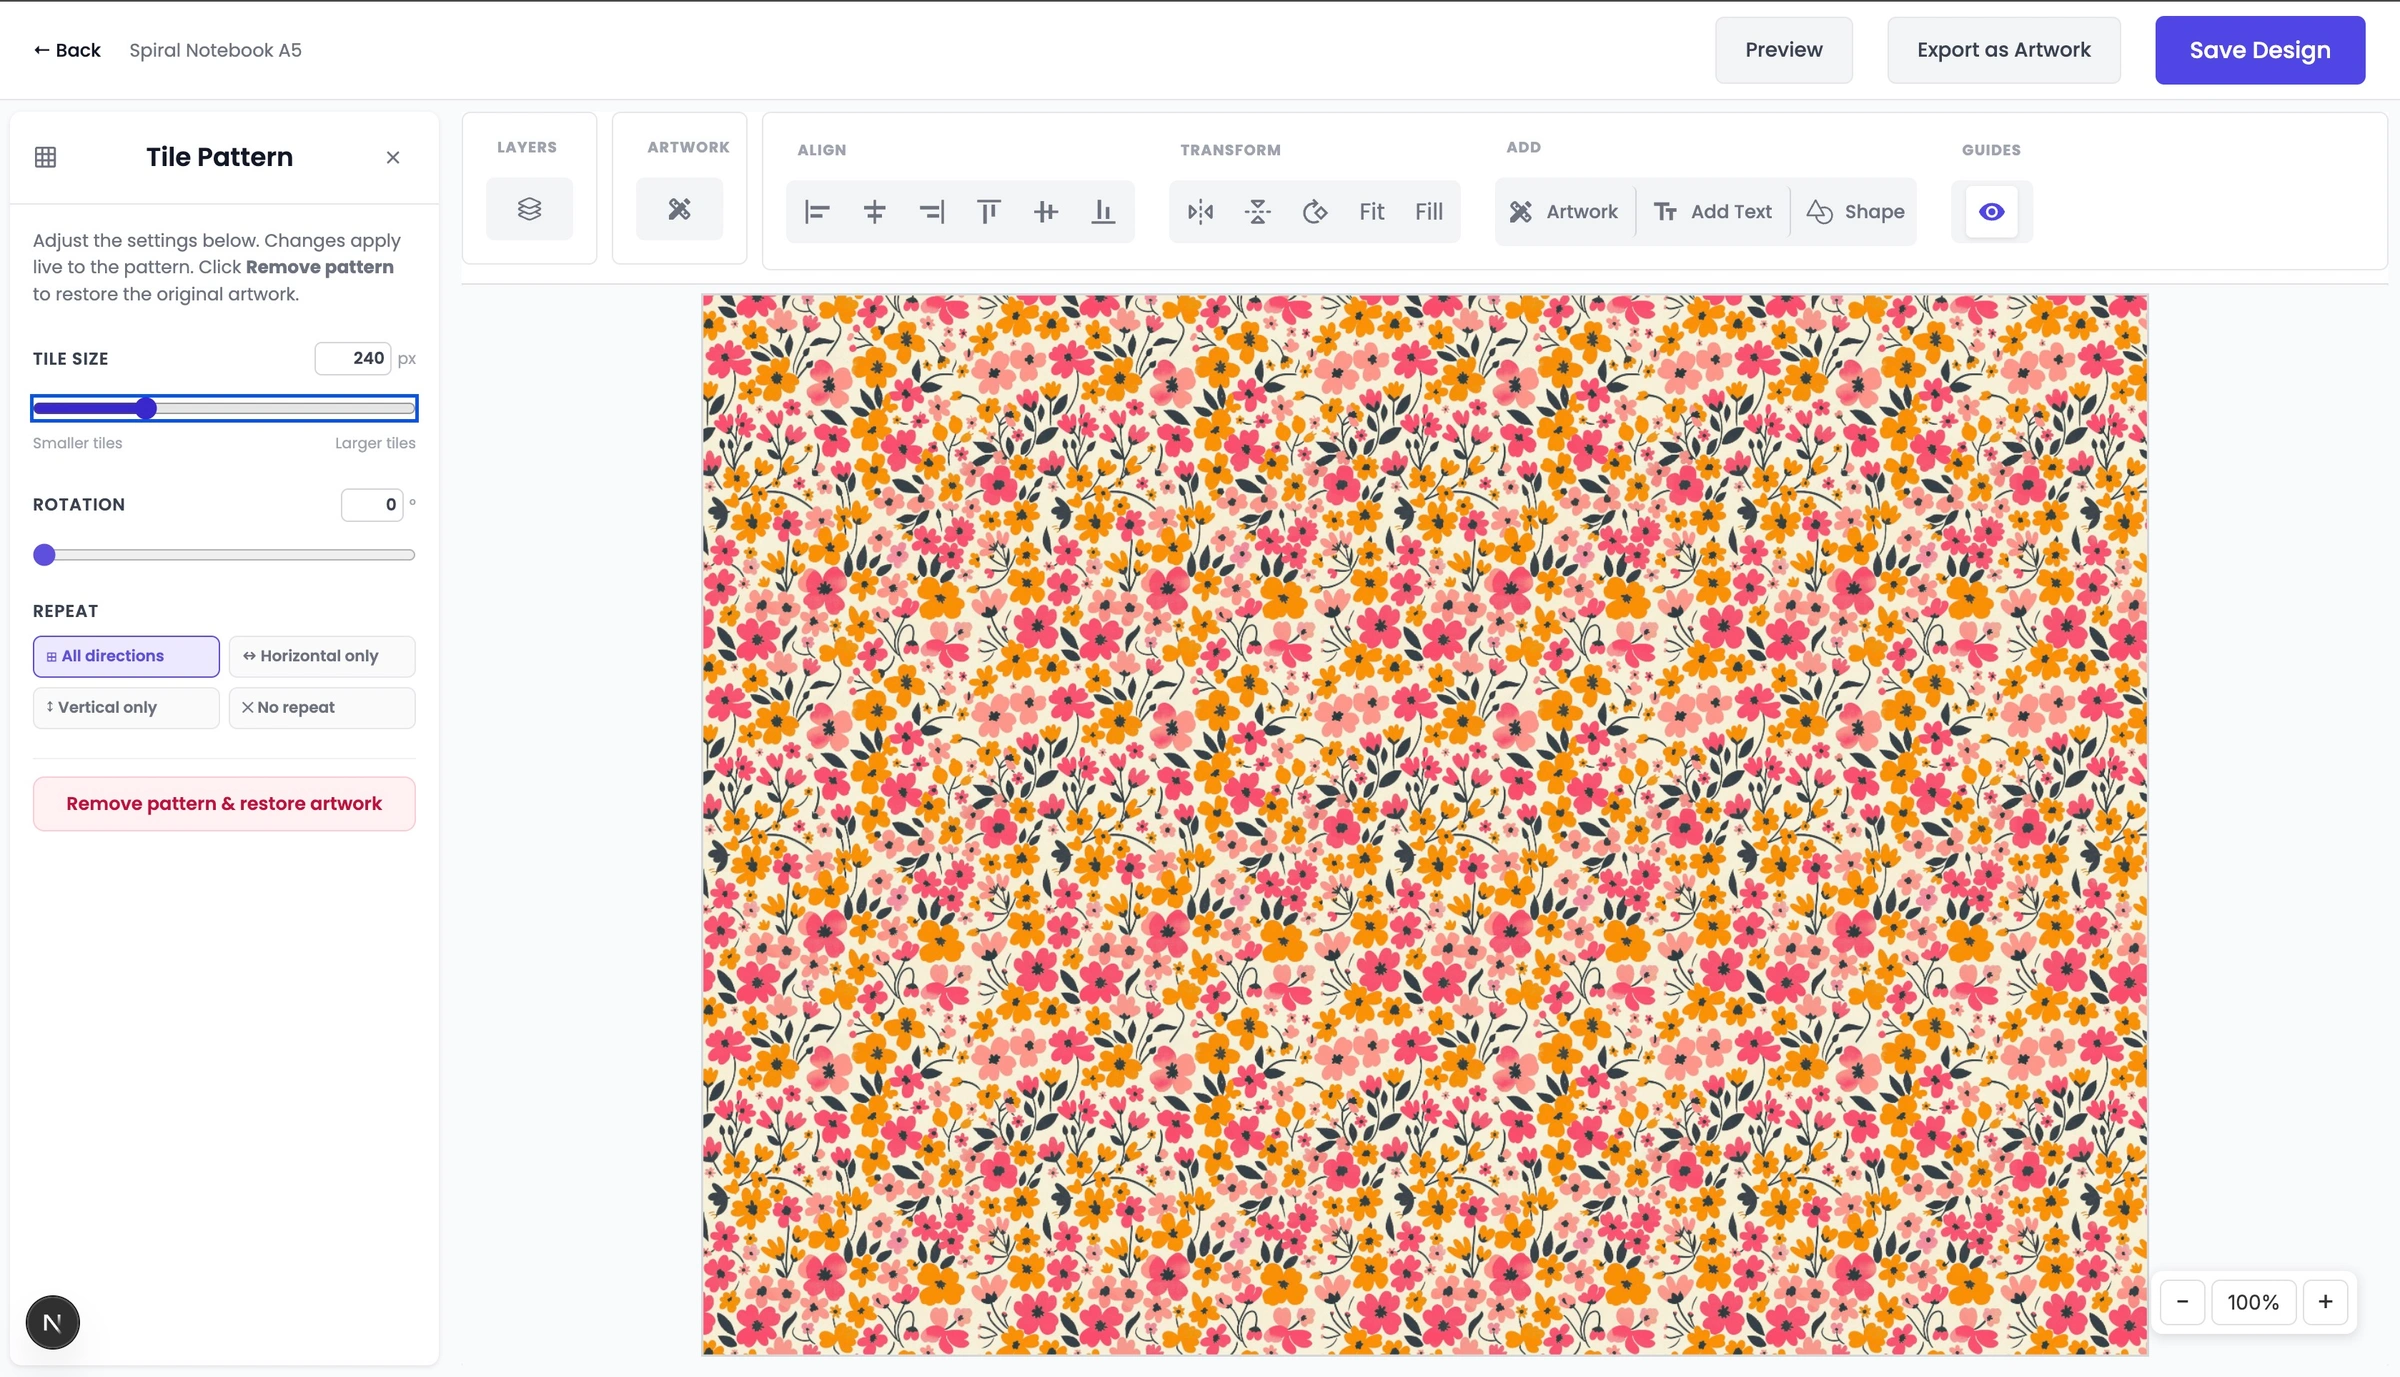
Step 7: Create Seamless Repeat Patterns
Turn any standalone graphic asset into a full-surface pattern. Our pattern utility allows you to tile your image across the whole canvas seamlessly, complete with adjustable tile scaling and rotation controls.
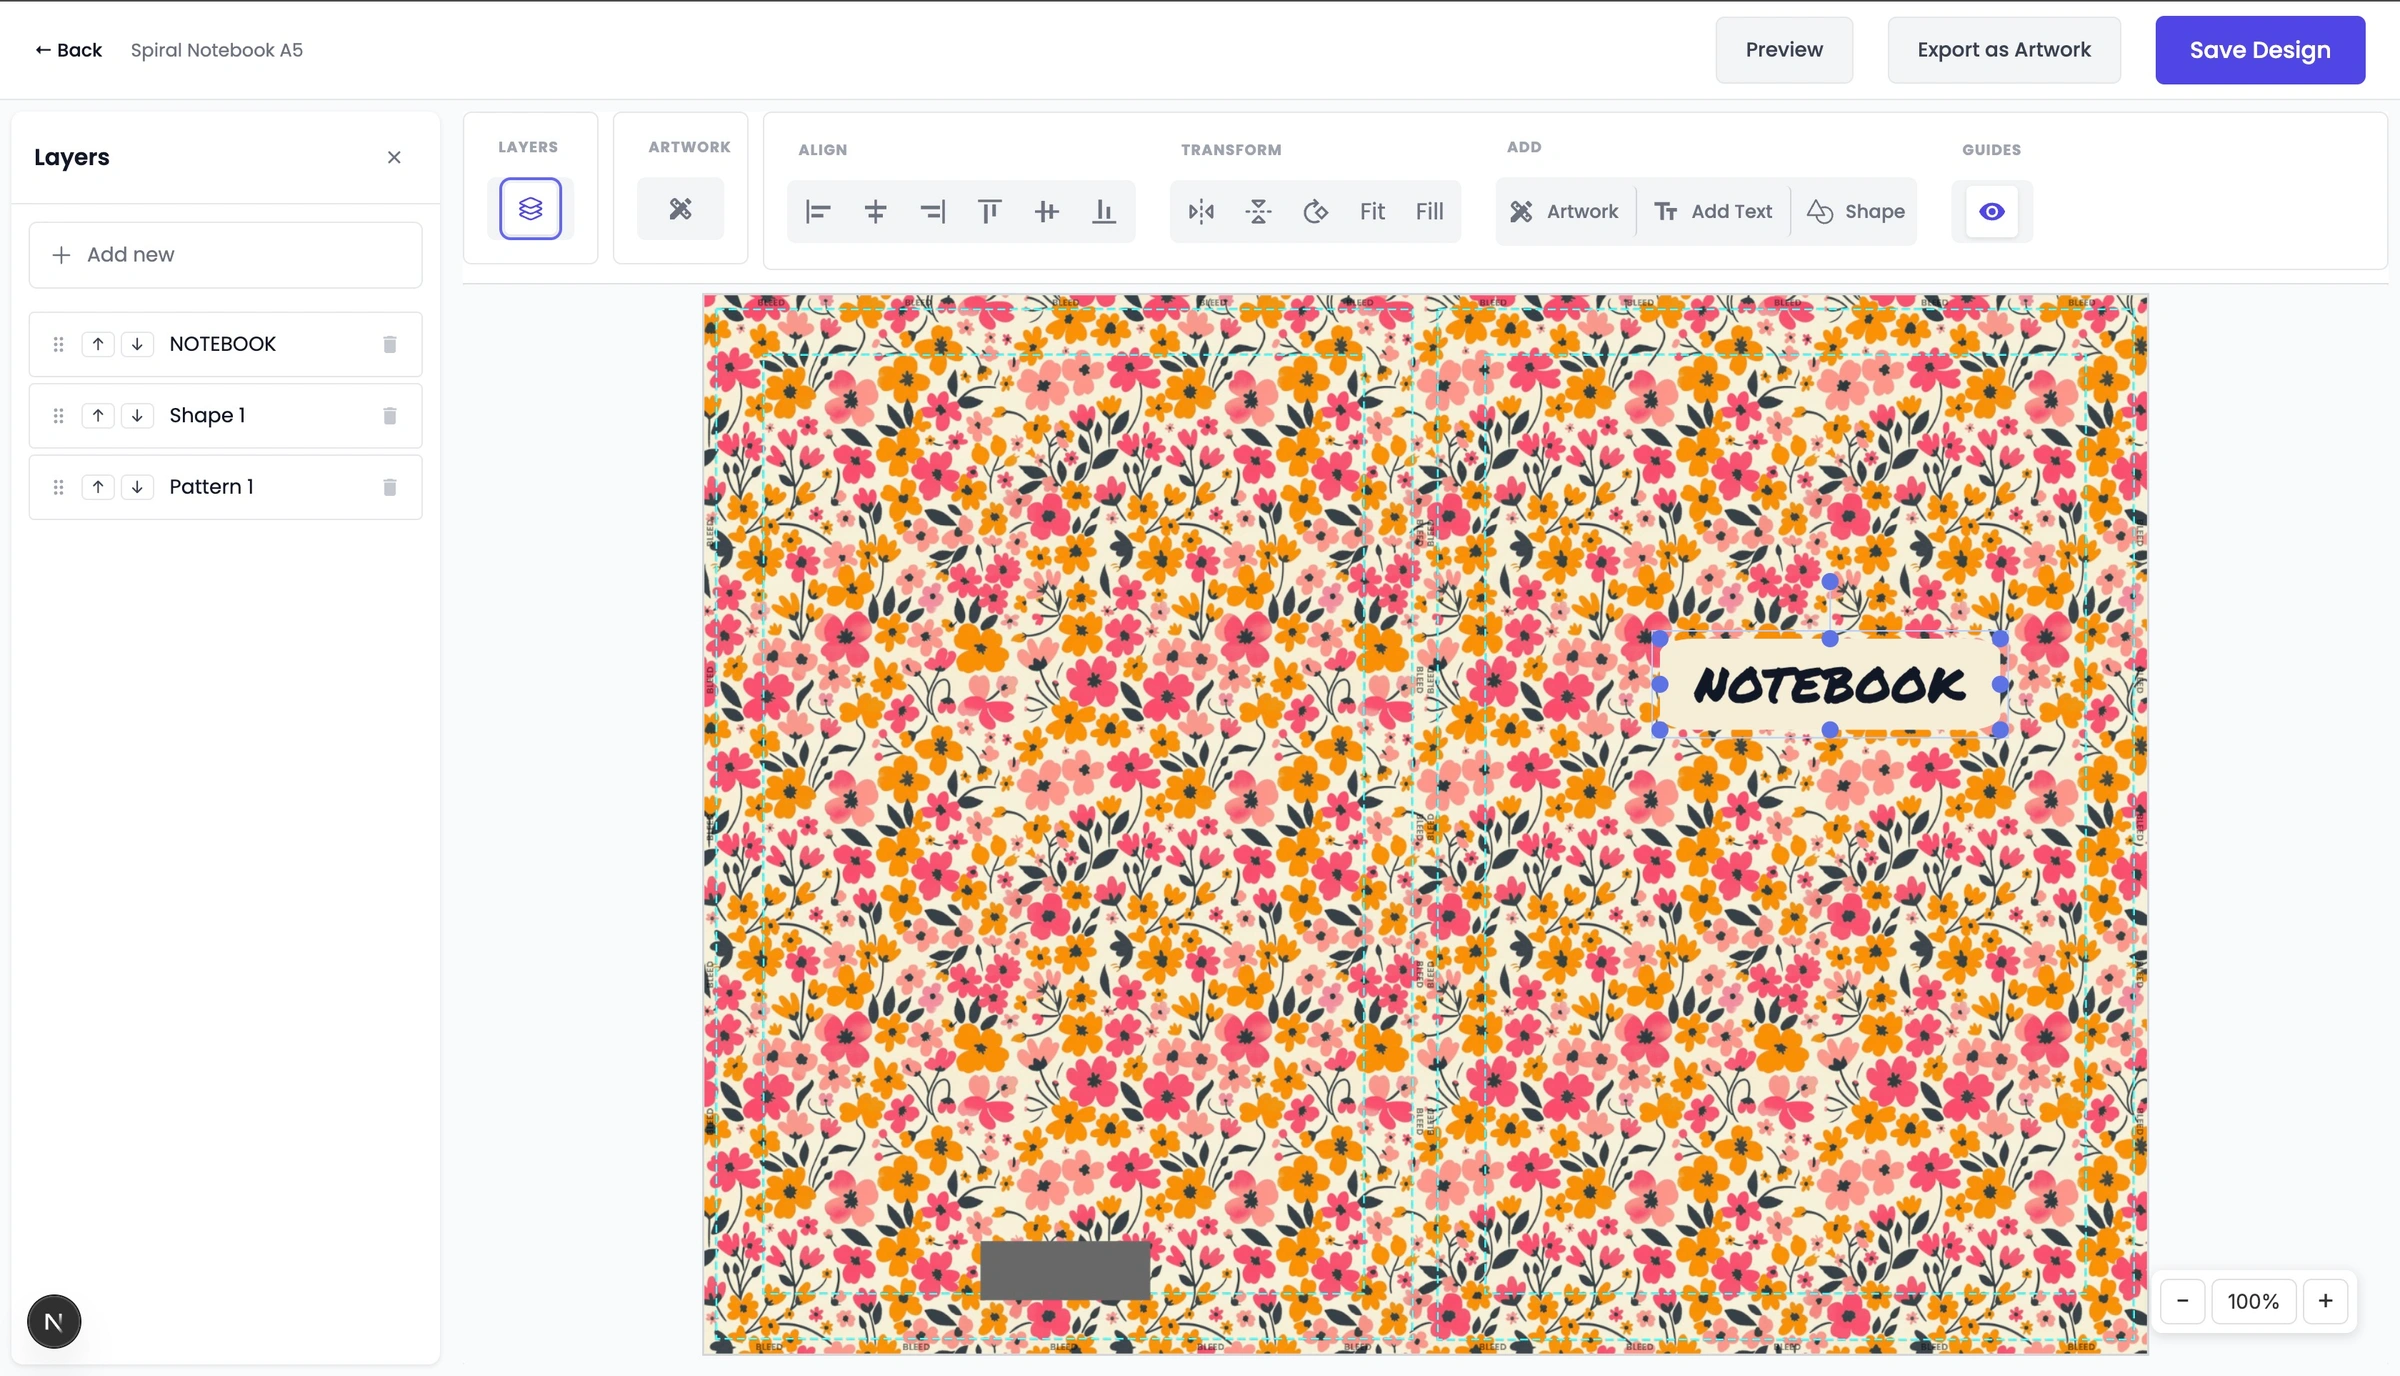
Step 8: Manage Objects with Layers
Organise your workspace layout using the dedicated Layers Panel. Easily drag elements up or down to arrange which objects, graphics, text blocks, or shapes sit on top of or beneath one another.
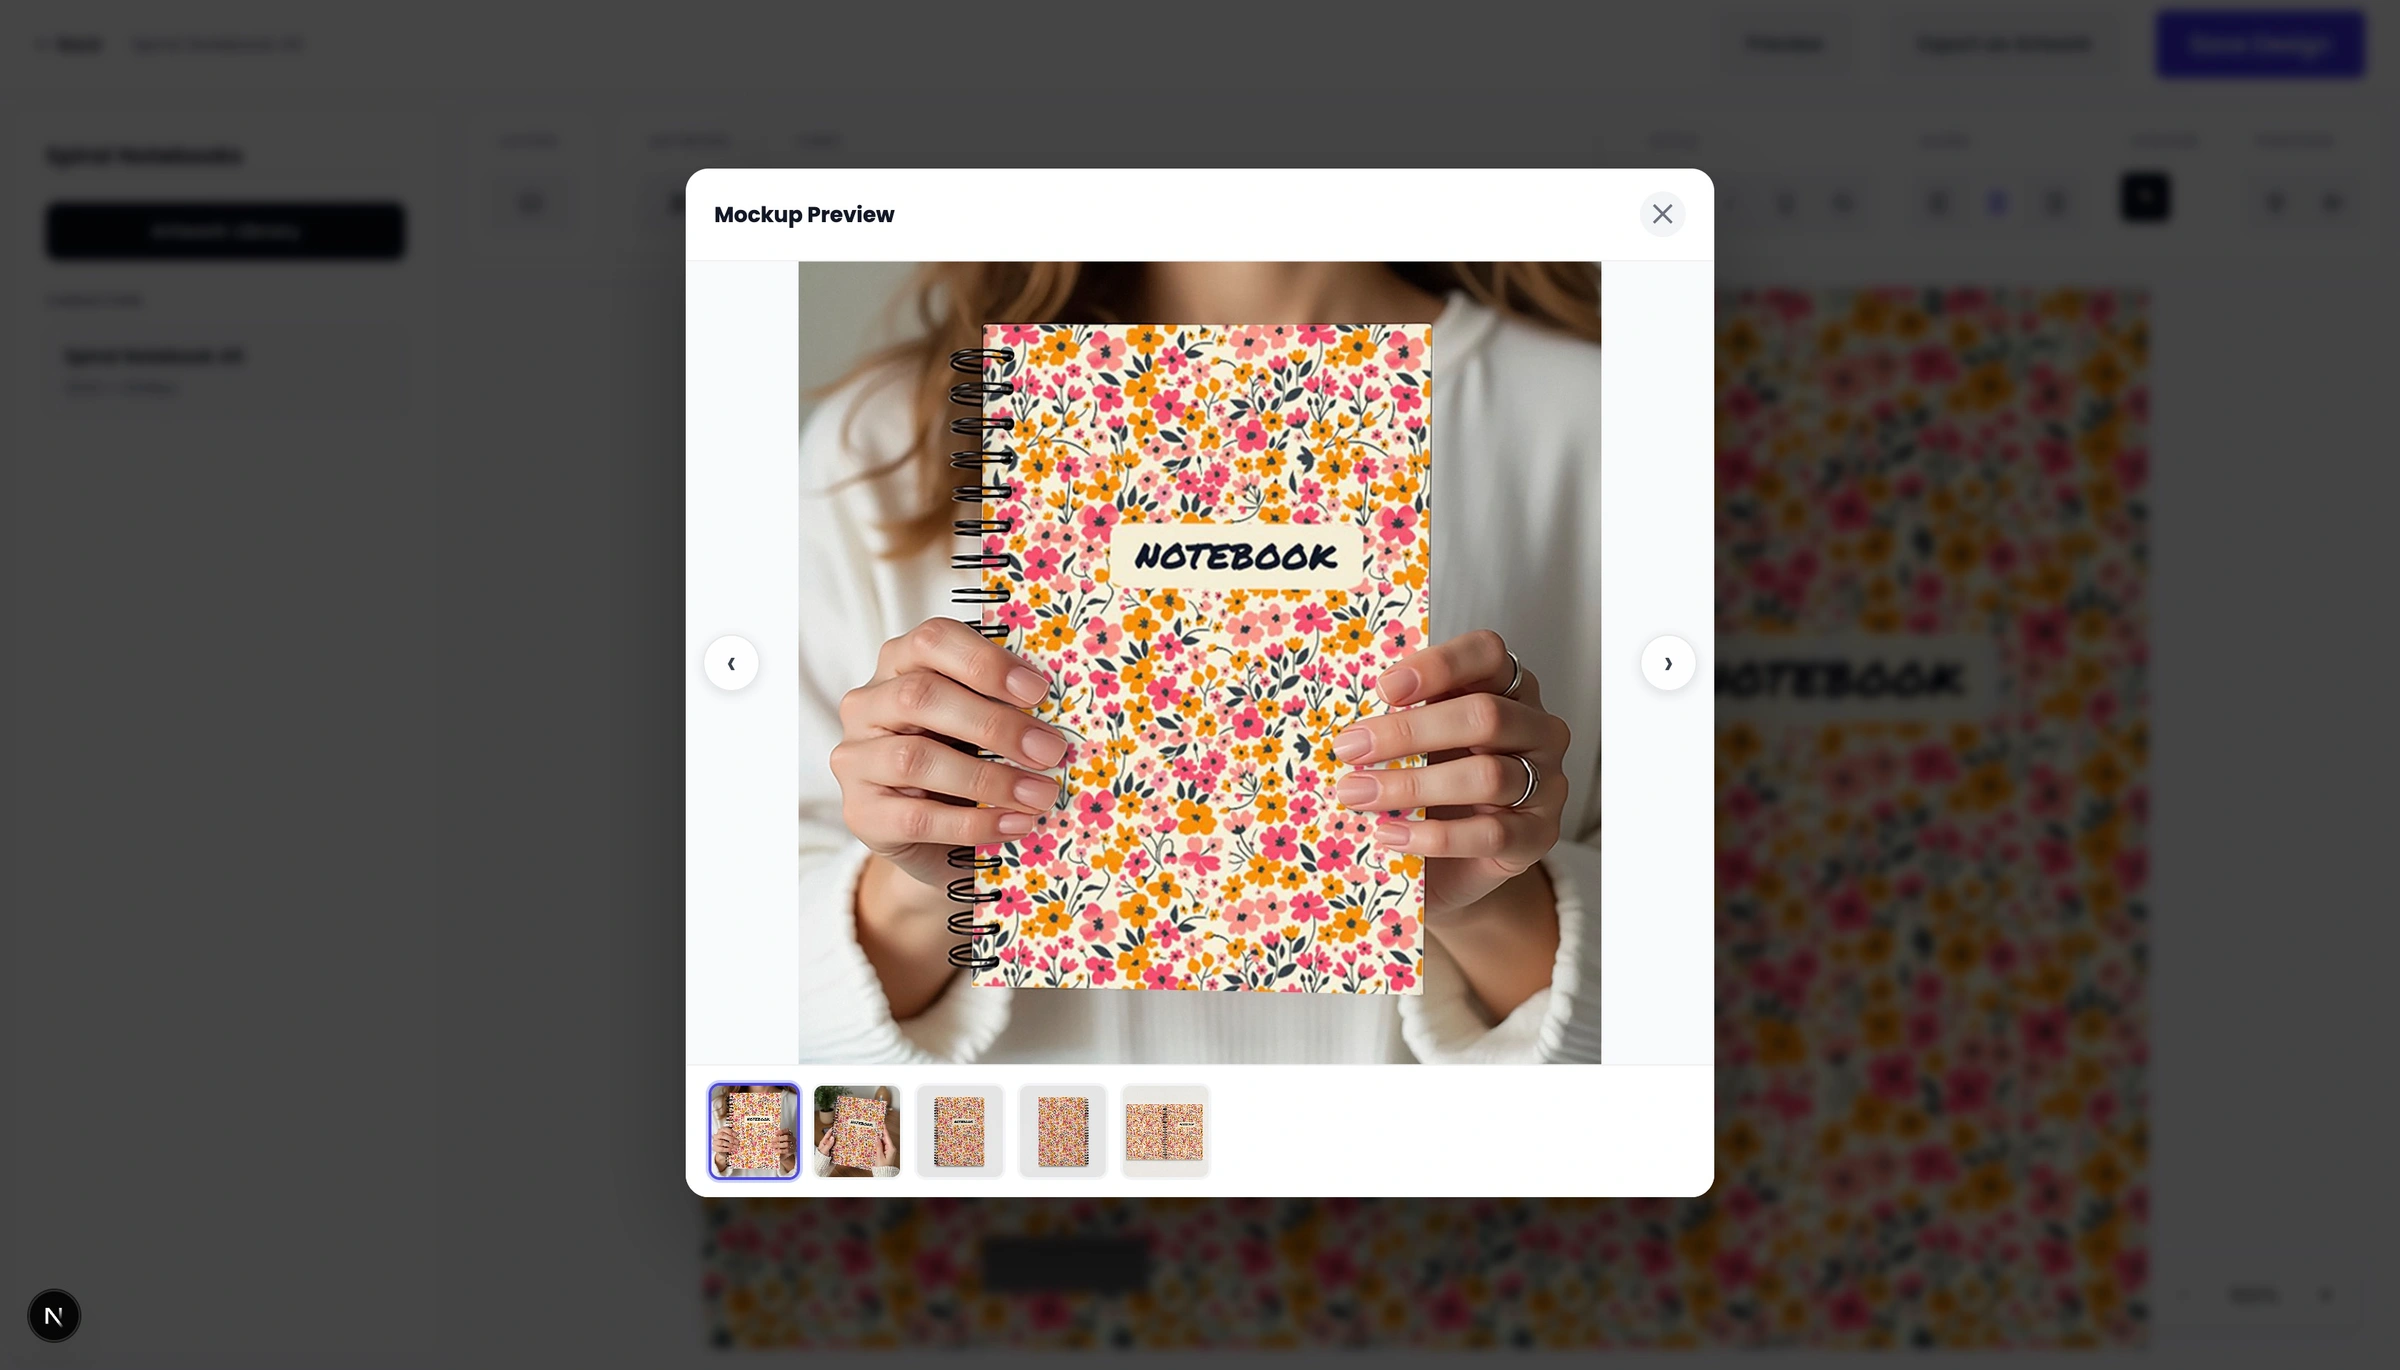
Step 9: Generate a Live Mockup Preview
When available for your product tier, click "Preview" to instantly generate an immersive digital mockup. This lets you view exactly what your layout will look like once wrapped, stamped, or printed onto the physical product.
Step 10: Save for Later Edits
If your project is still a work-in-progress, click "Save the Design". This preserves all of your layers, text blocks, and objects exactly as they are so you can return to the dashboard later to make further changes.
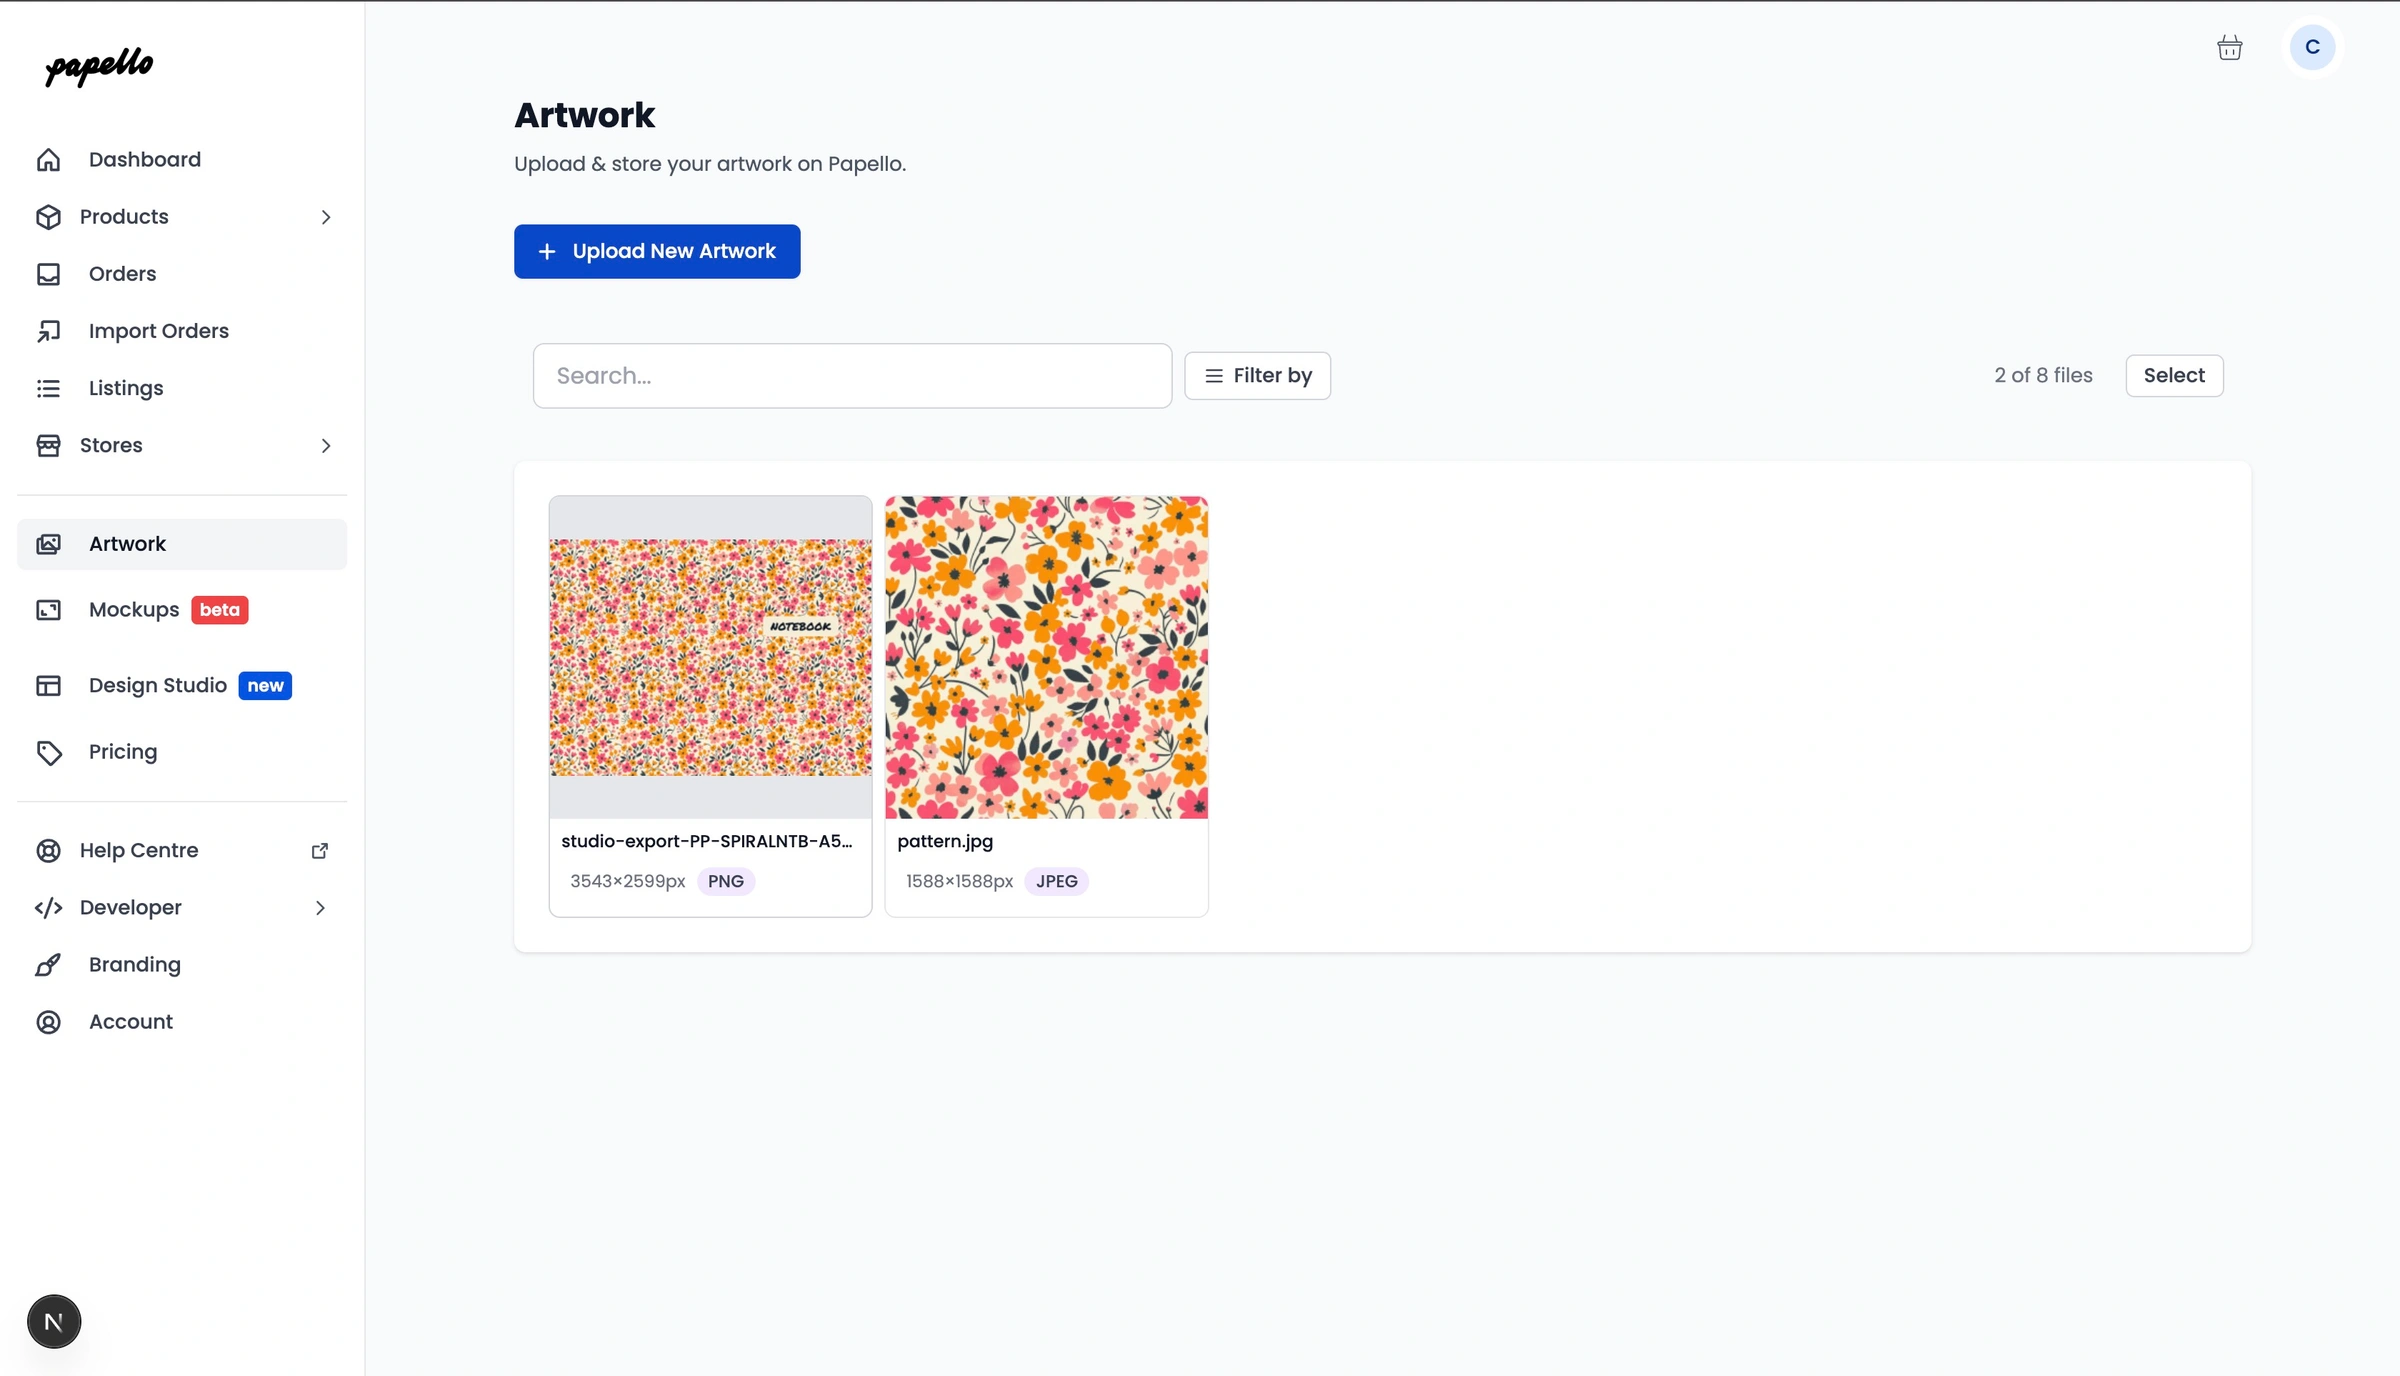
Step 11: Export directly to your Artwork Library
When your design is complete, click "Export as Artwork". The studio will instantly flatten your elements and render a high-resolution, print-ready file optimized precisely to the product dimensions. It will be saved instantly to your Artwork Library, ready to be selected for automatic e-commerce fulfilment or manual orders.