Personalised products are absolute powerhouses for Etsy sellers. Whether offering custom birth-flower mugs, bespoke pet portrait framed prints, or custom family greeting cards, shoppers actively search for tailored gifts and they are routinely willing to pay a premium for them.
However, for Etsy print-on-demand (POD) sellers, custom orders historically created a major operational bottleneck: manual graphic design work. Every time a buyer placed an order, you had to open Photoshop or Illustrator, type out their custom text, swap background graphics, export a high-resolution PDF, and manually upload it to your print supplier.
With Papello’s Custom Fields feature inside the Design Studio, you can fully automate this workflow. By building dynamic, self-rendering artwork templates and syncing them directly with Etsy, customer inputs automagically generate high-resolution, print-ready files the moment an order is placed.
Here is a complete step-by-step guide on how to set up, publish, and manage a hands-off personalised Etsy print-on-demand shop.
Key Personalisation Types You Can Automate
When creating a dynamic template in Papello’s Design Studio, you can choose from three distinct custom field types to build virtually any customised product:
Step-by-Step: Creating & Syncing Personalised Listings to Etsy
1.Add Interactive Fields in Design Studio:
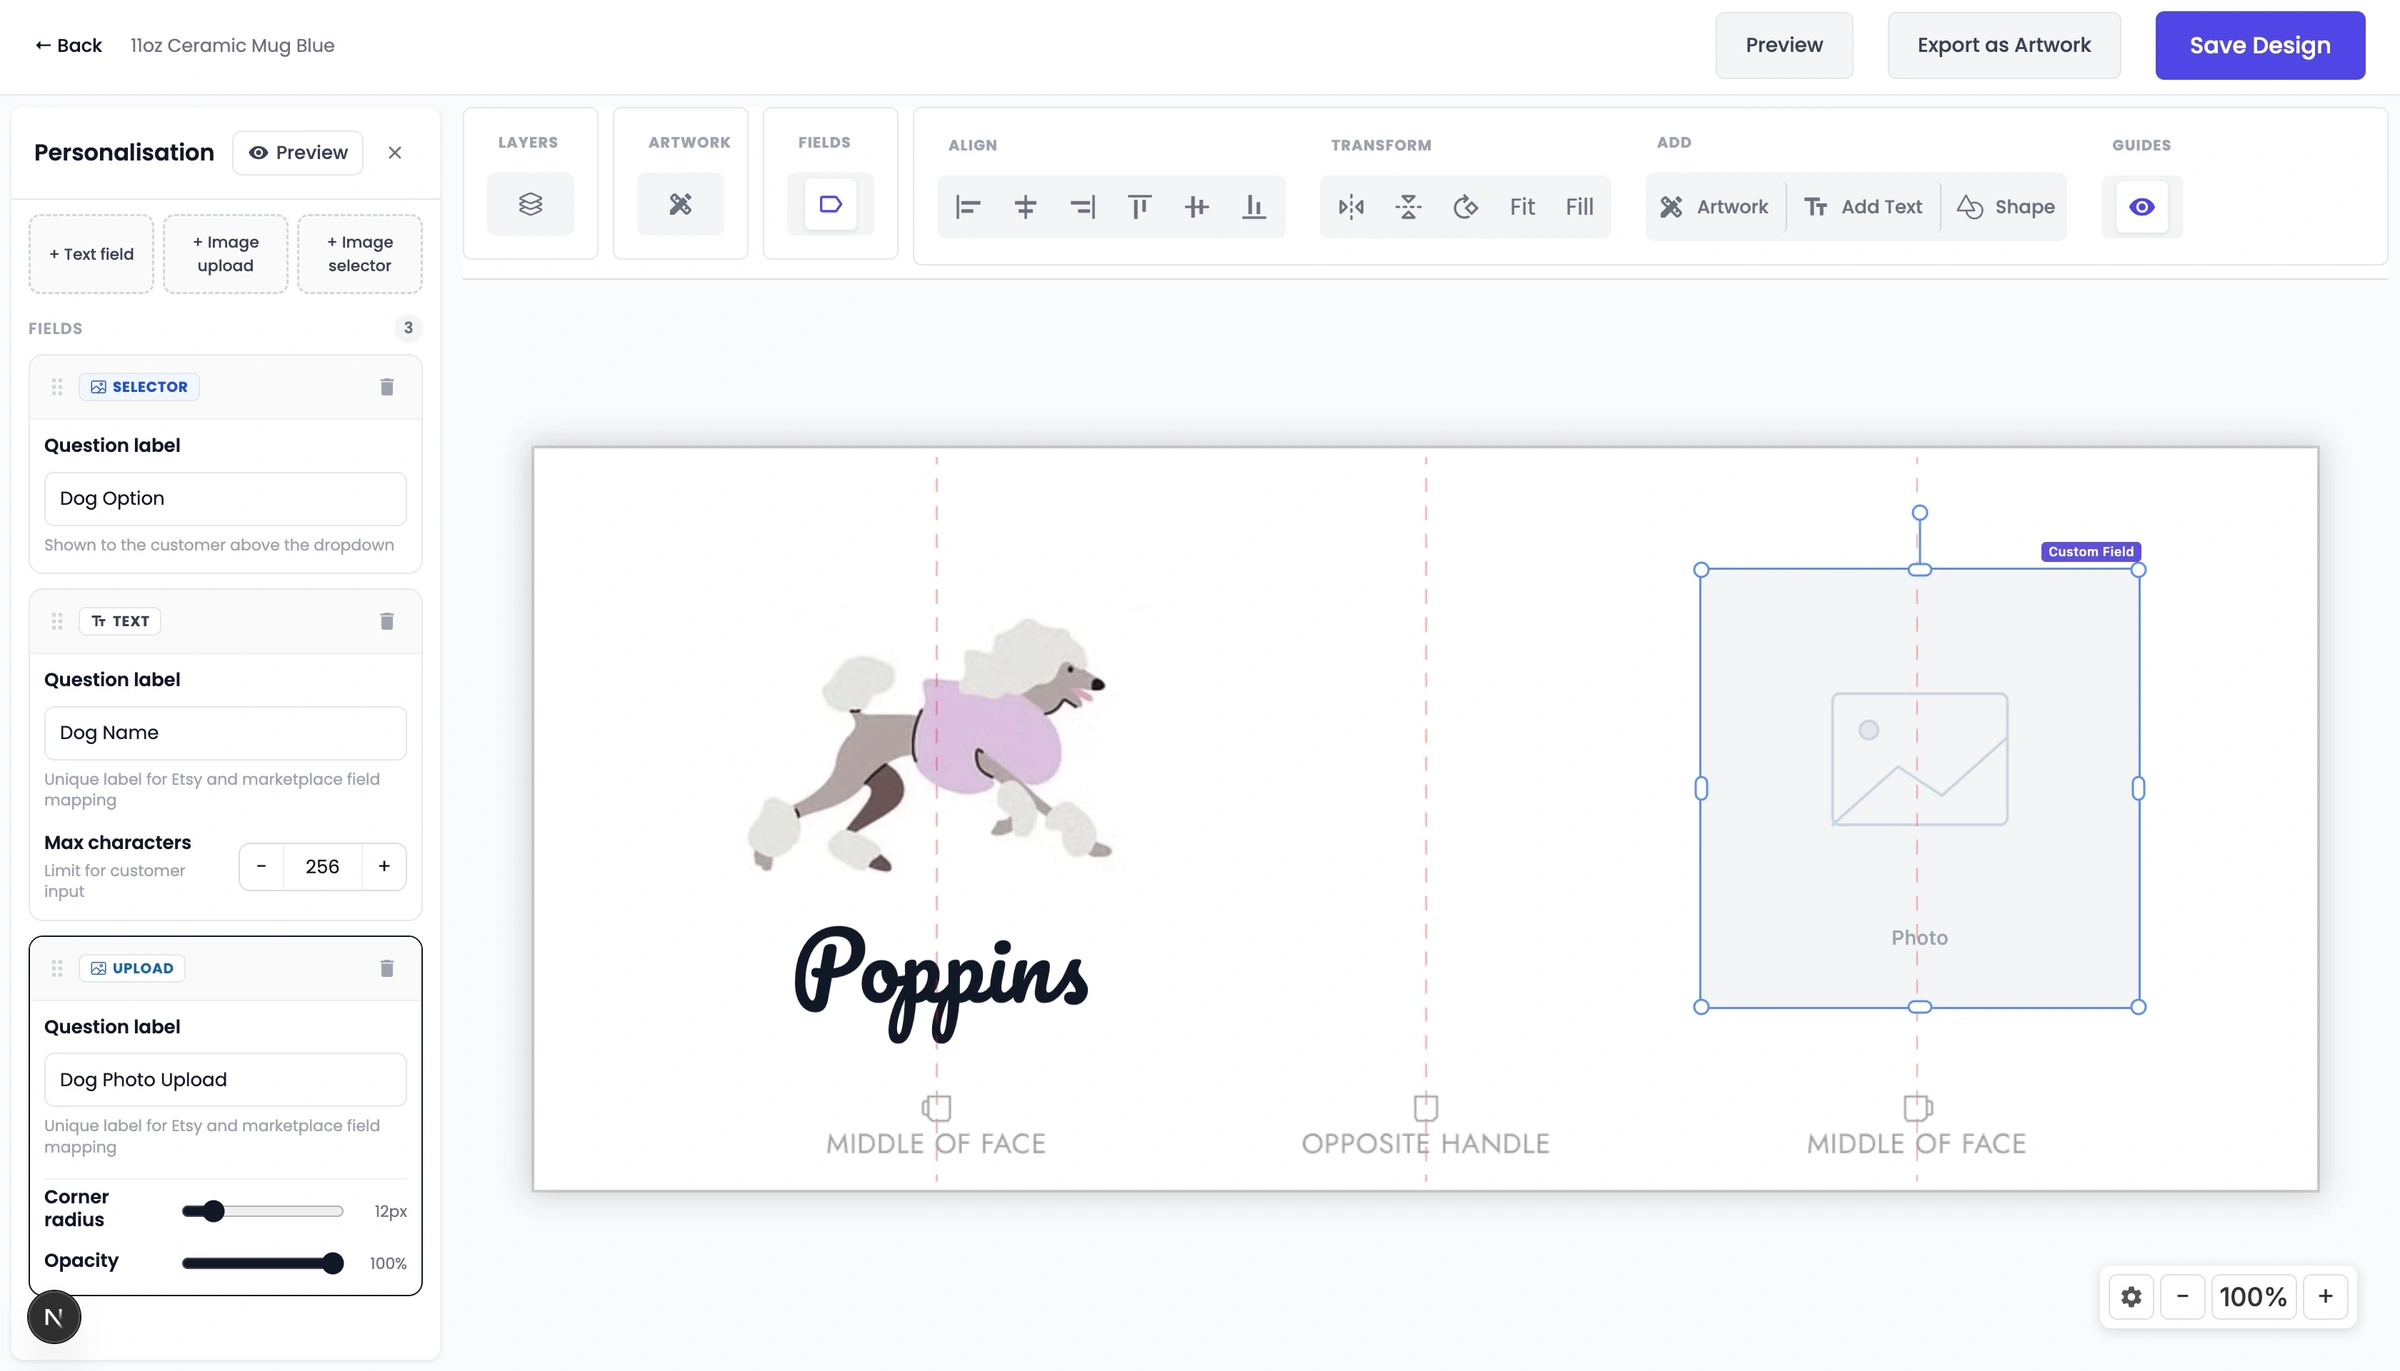
Open the Papello Design Studio and select your base product (such as a custom mug, framed poster, or greeting card). Click the Fields button on the top toolbar to open the personalisation drawer, then choose Textbox, Image Selector, or Image Upload to place placeholder frames onto your canvas.
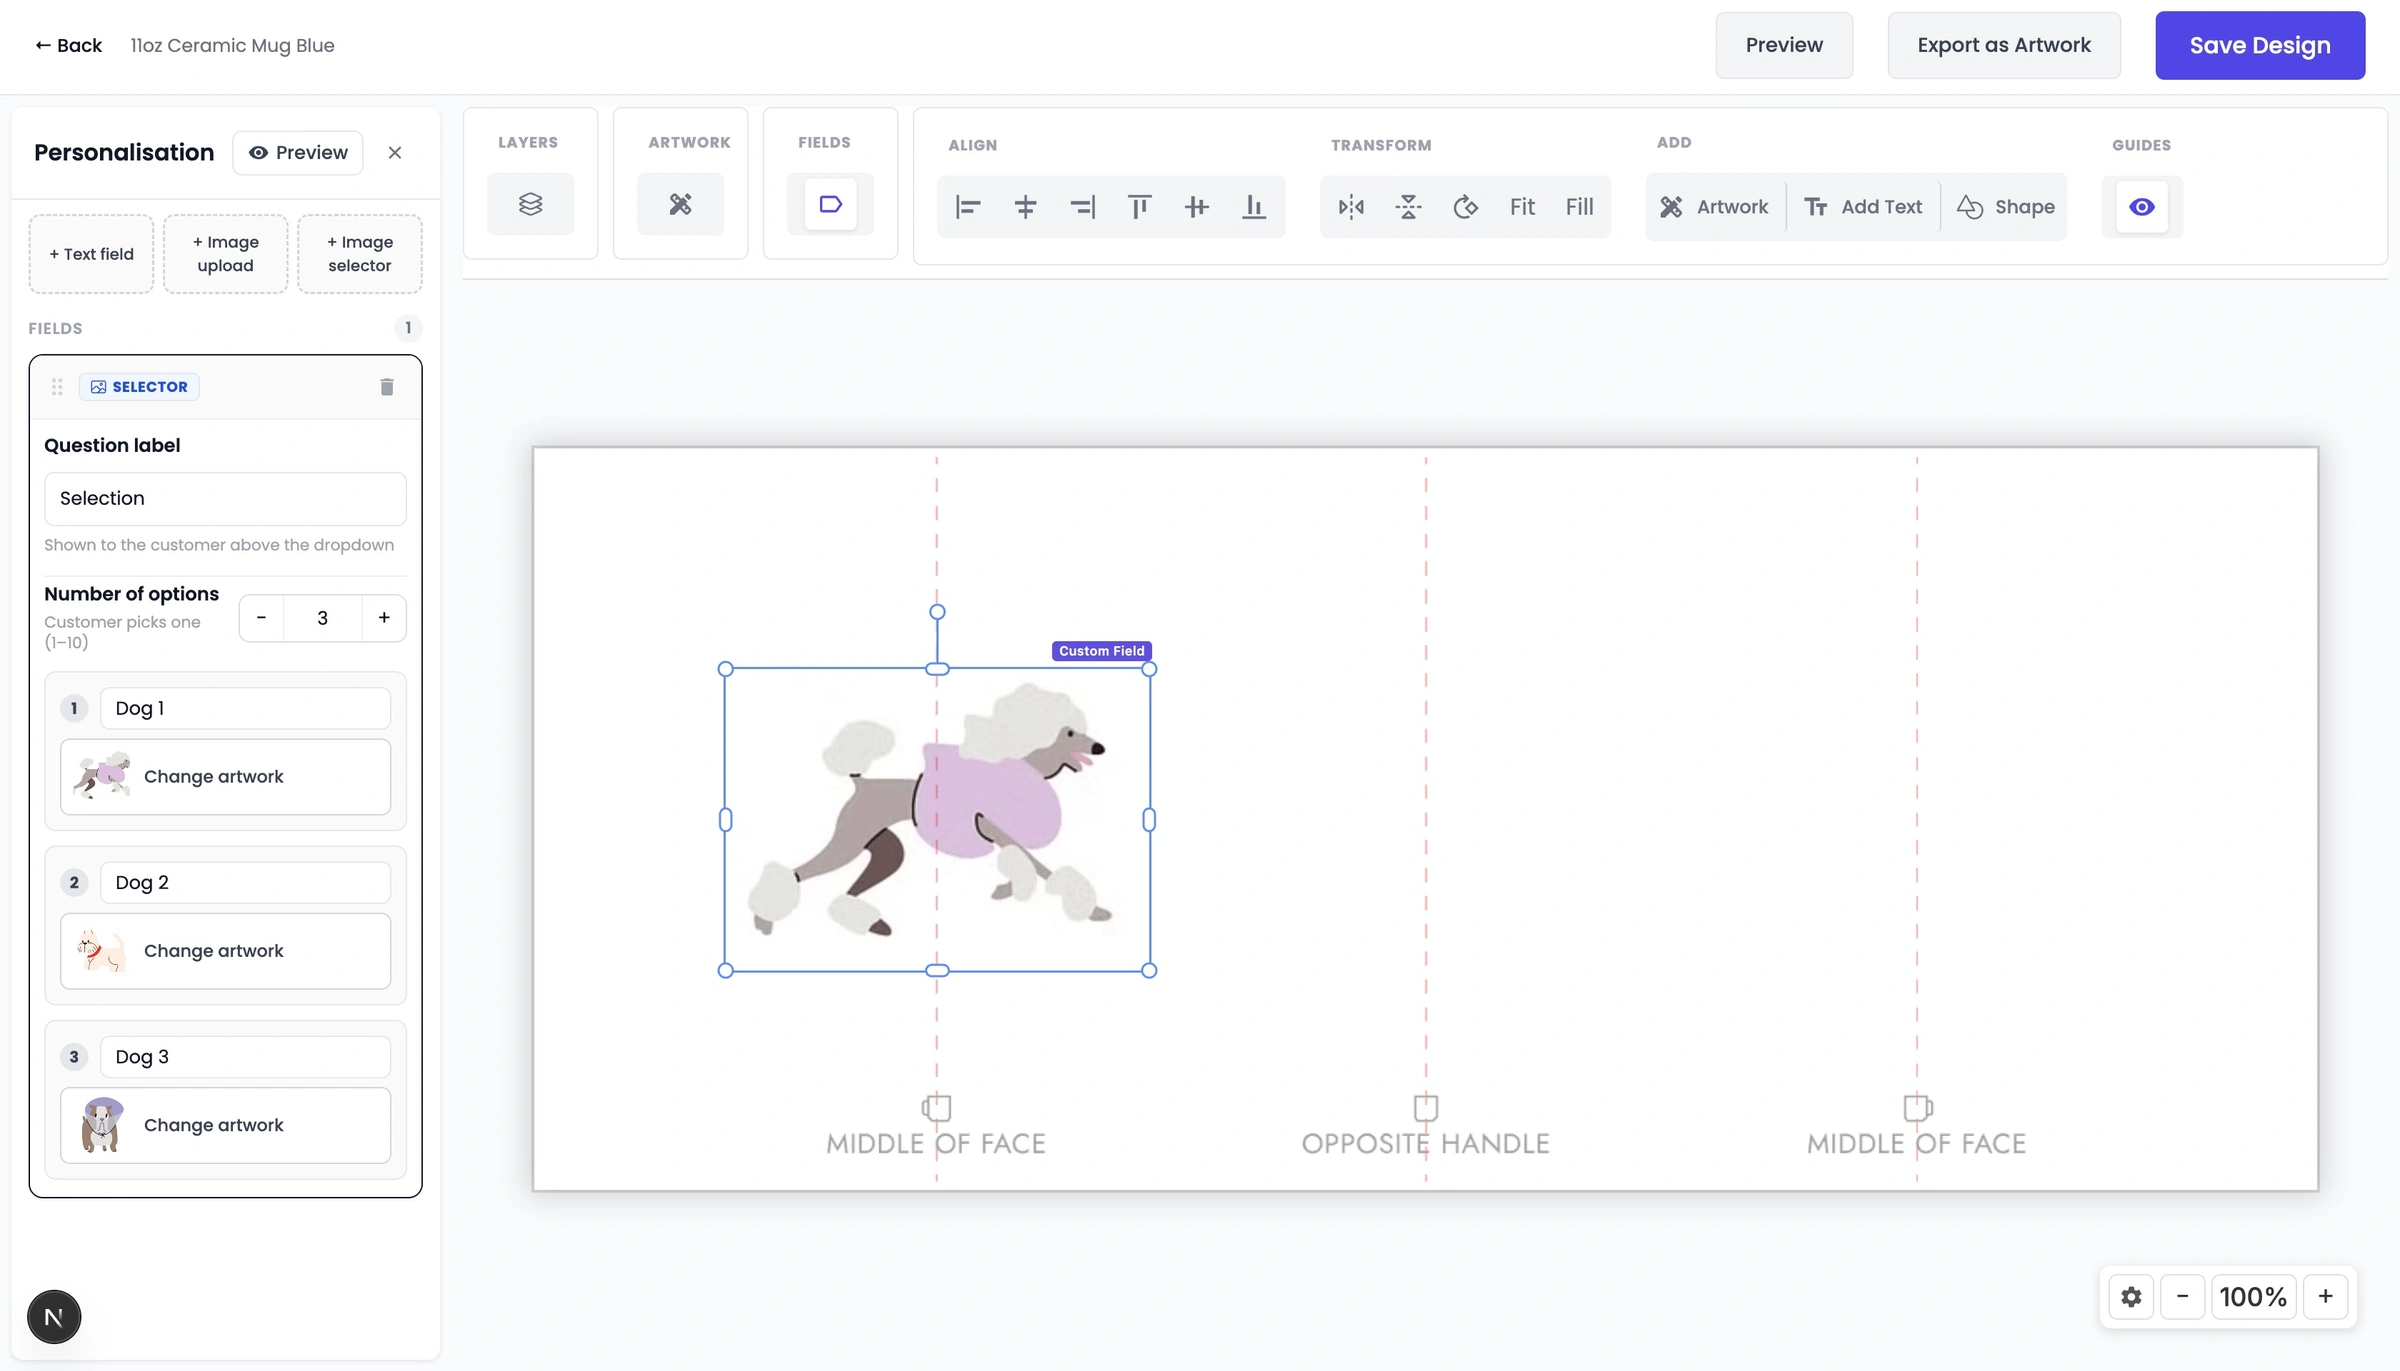
Note: Etsy allows up to 5 custom fields per listing. Across these fields, you can include up to 10 image upload slots and 30 variant options for image selectors.
2.Assign Clear Question Labels:This prompt maps directly to the personalisation box on Etsy.
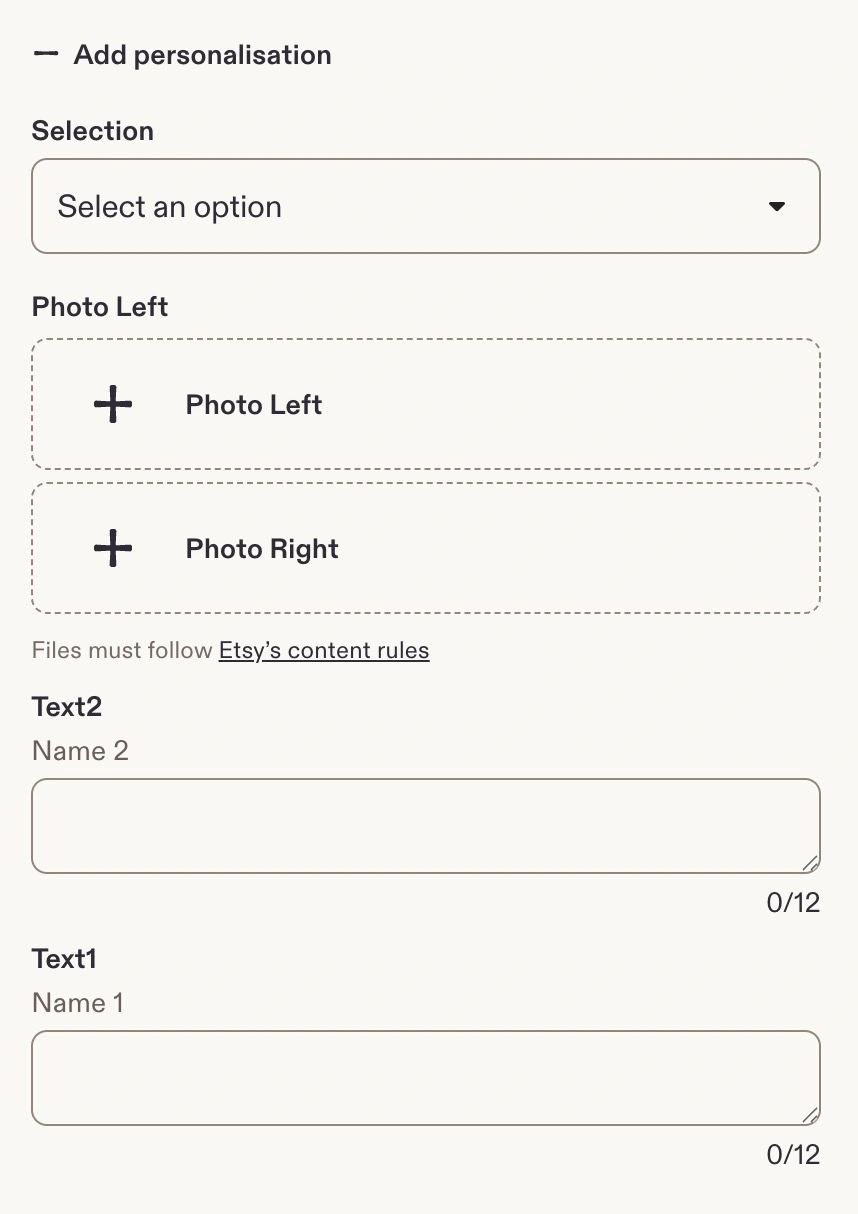
For every field added to your artboard, give it a precise Question label (e.g., "Enter child's name for card" or "Select dog breed"). This is the exact prompt your buyer will see when ordering on Etsy.
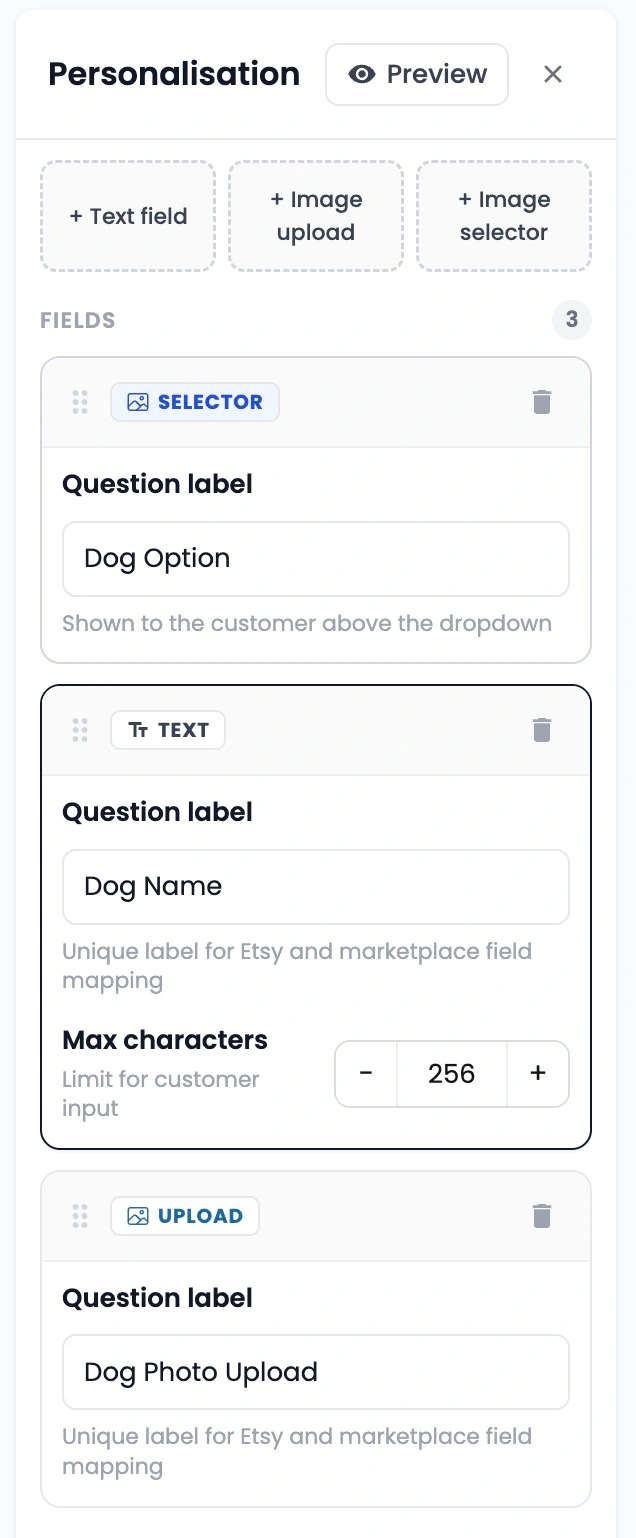
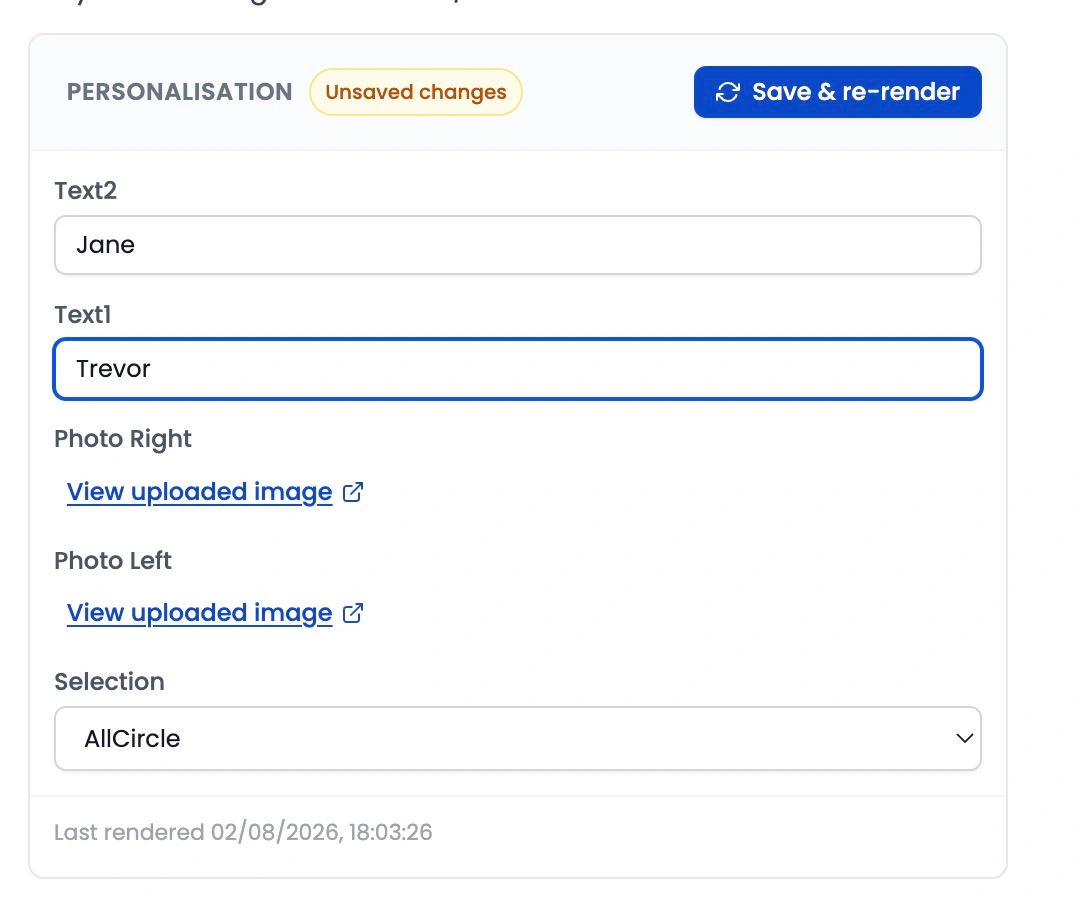
3.Test in the Interactive Simulator:Test with unusually long names to verify auto-fit settings.
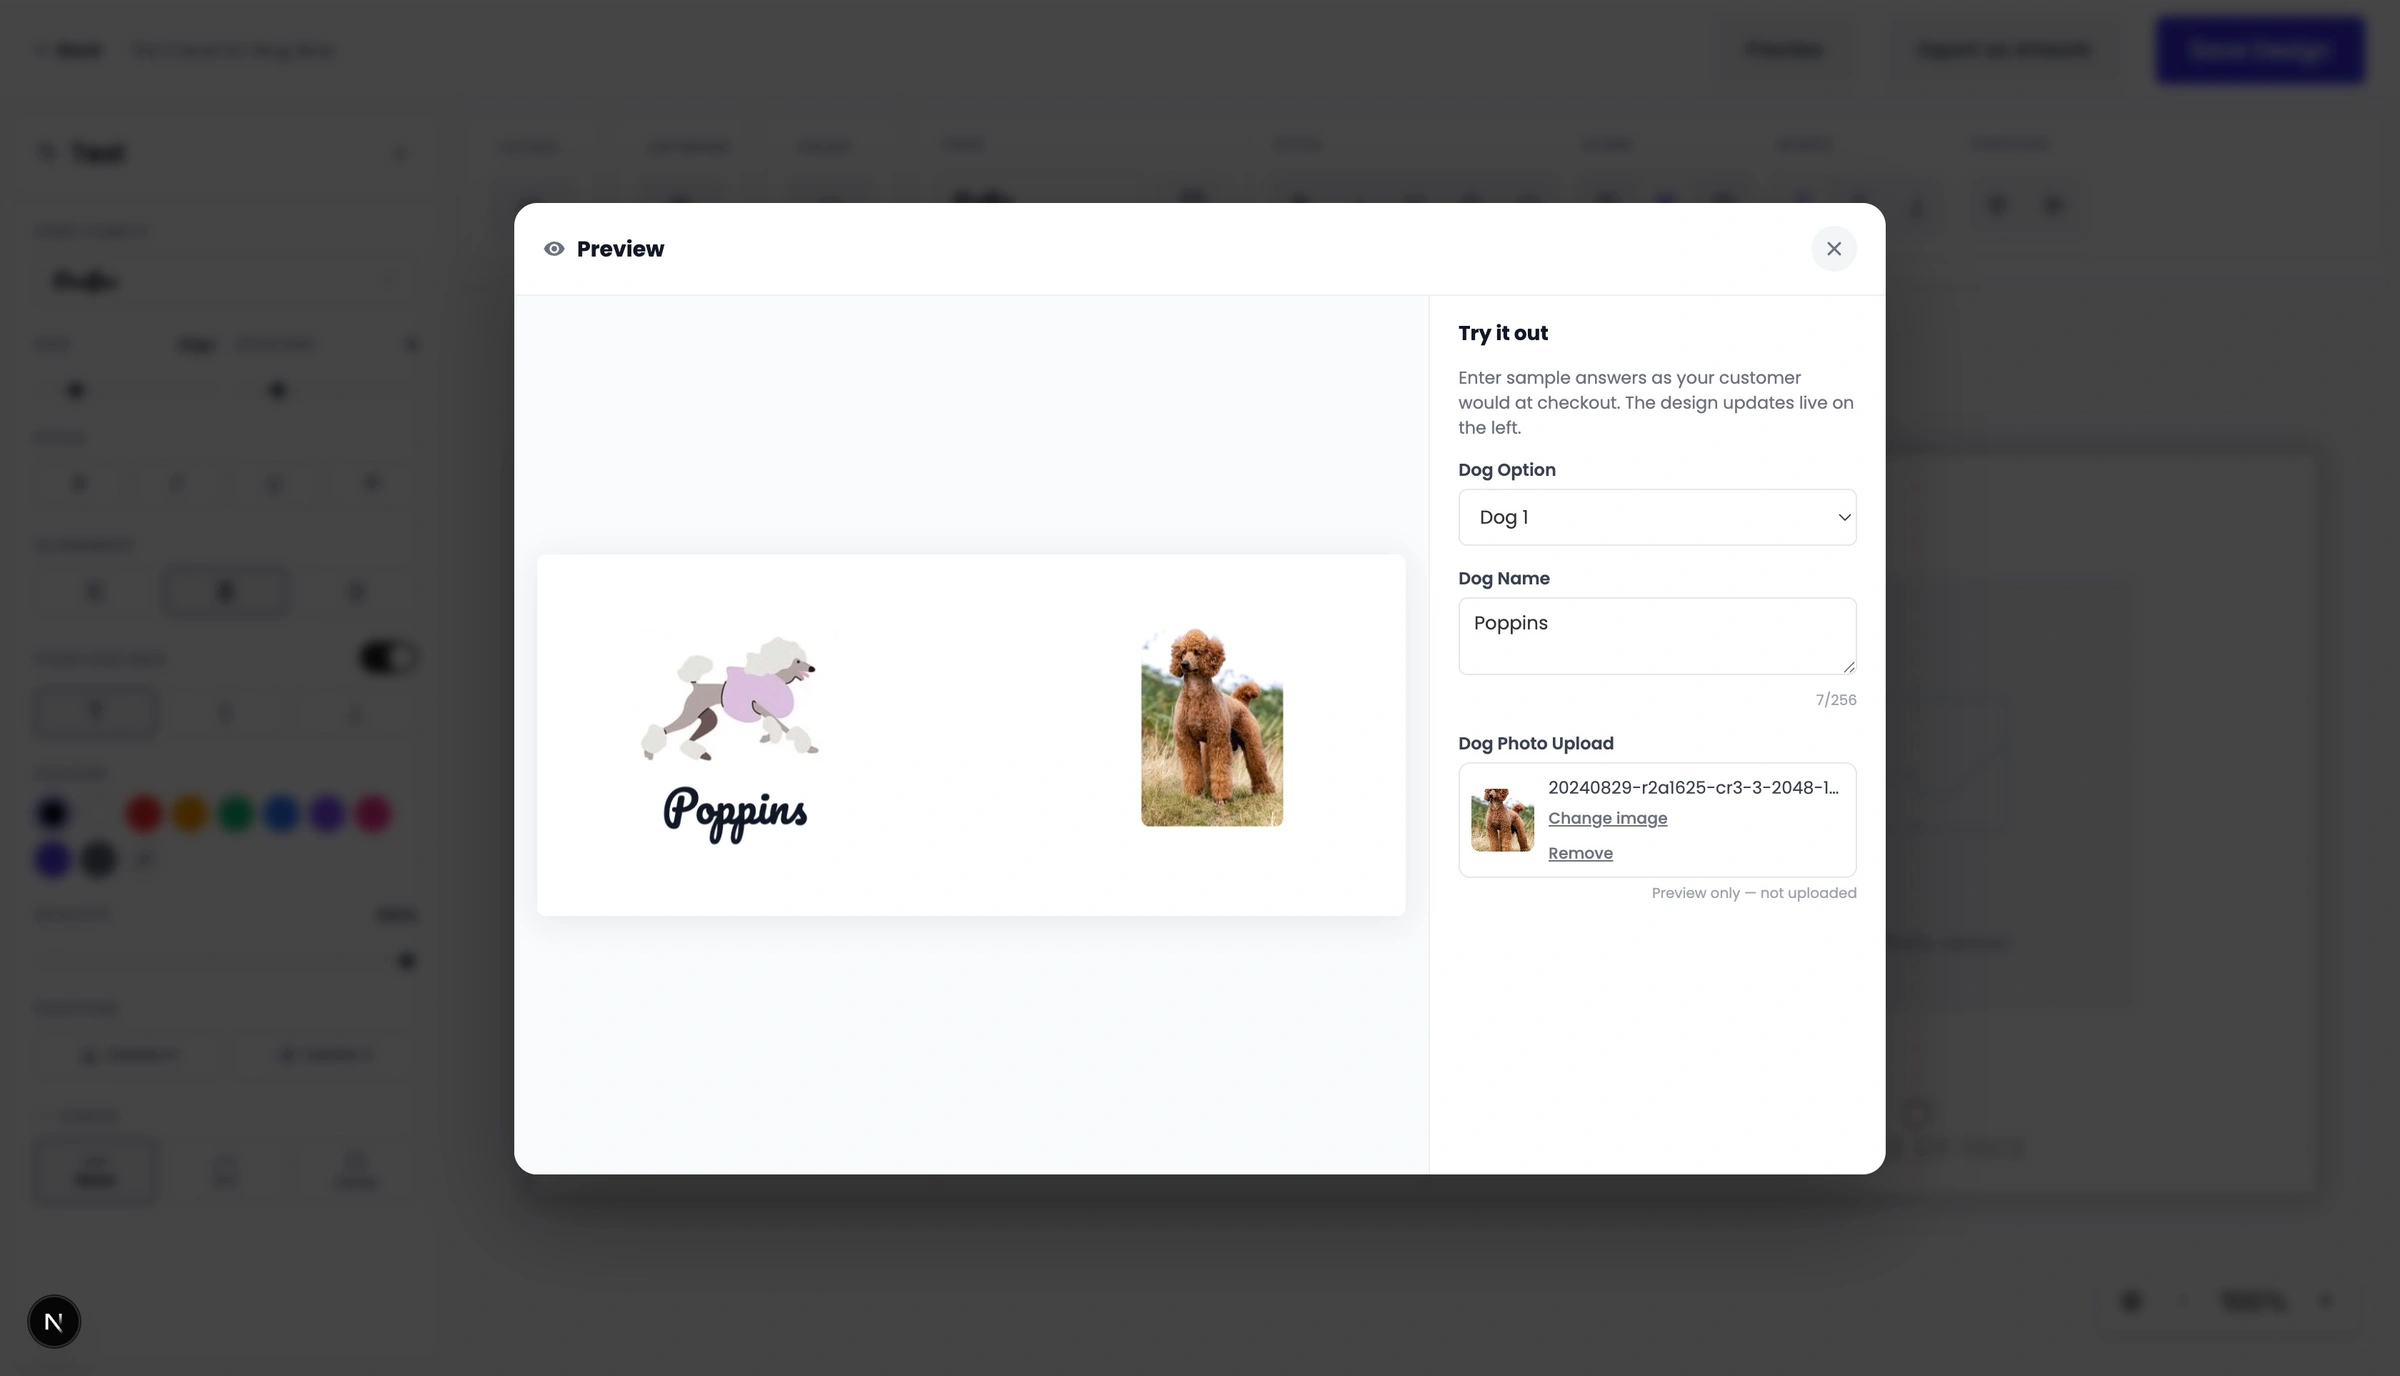
Click the Preview tab in the sidebar to launch the interactive simulator. Type out test text and select different image options to watch Papello render high-resolution print files in real time. Ensure your "Fixed Textbox Size" setting scales long text down smoothly.
4.Save Your Dynamic Template:
Once you save your project, a "Personalised fields" badge will appear on the template card in your Design Studio dashboard, making dynamic designs easy to identify at a glance.
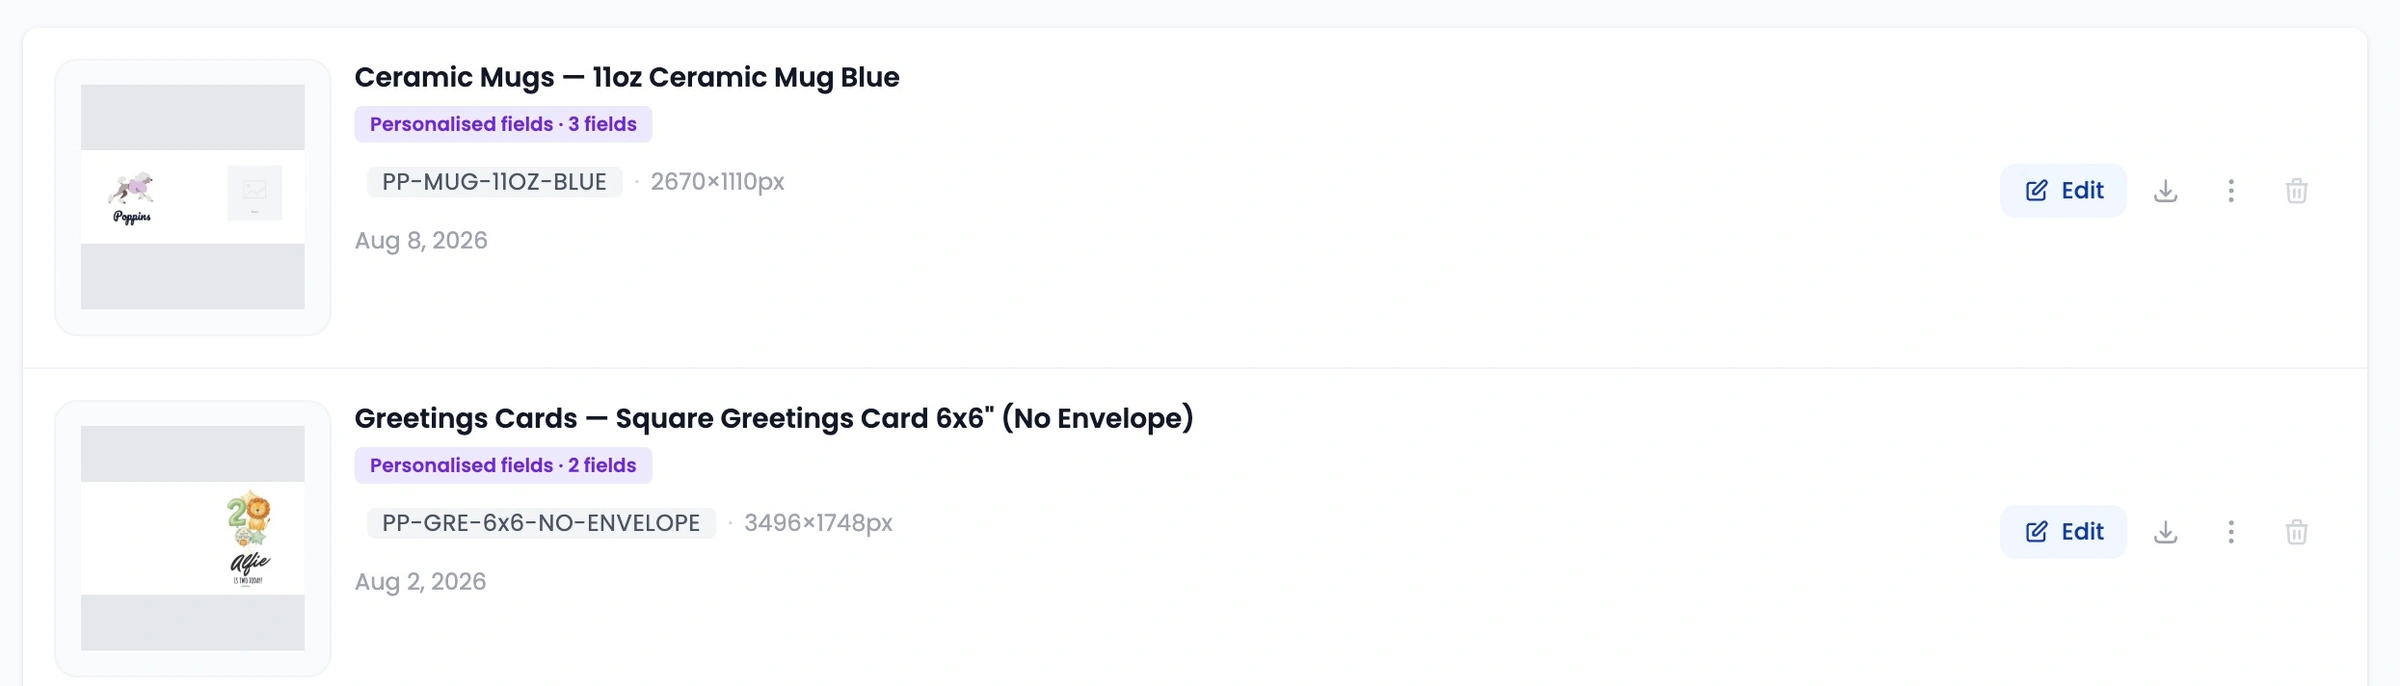
5.Create Your Papello Listing:Design on the largest size (e.g., A2) so smaller options scale crisply.
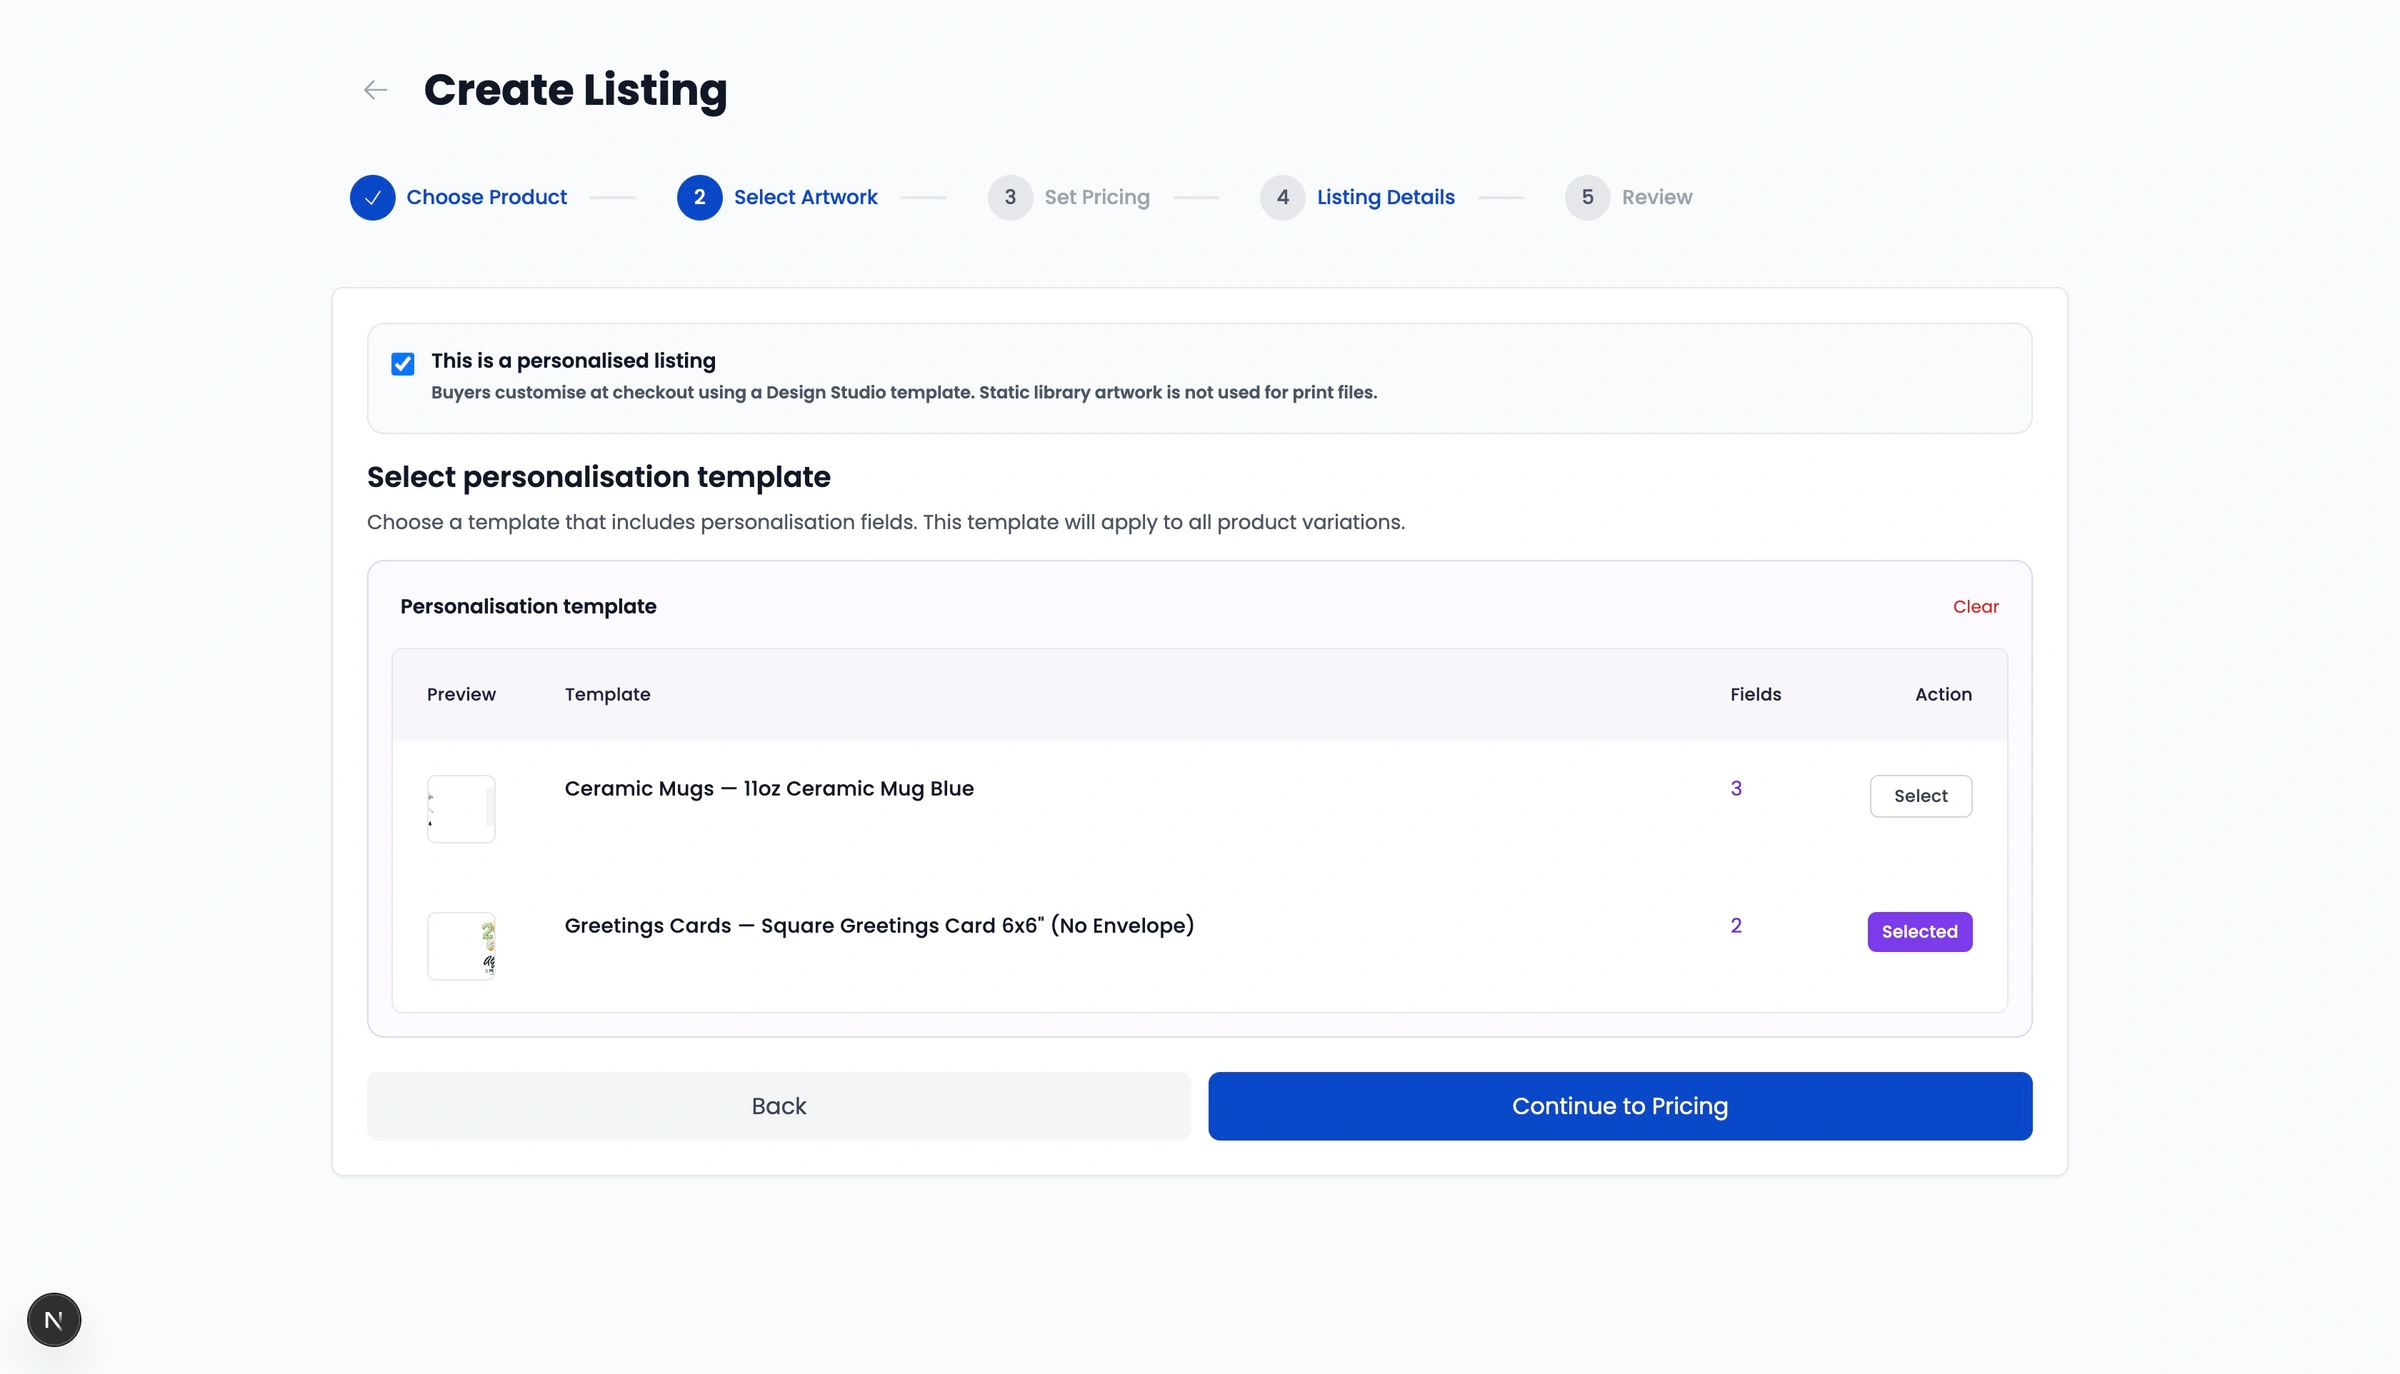
Navigate to Listings > Create Listing in your dashboard. Choose between a Single Product or Variation Product. In Step 2 of the creator, tick "This is a personalised listing". This switches your artwork selection menu from static graphics to your saved dynamic templates.
6.Publish Directly to Etsy:
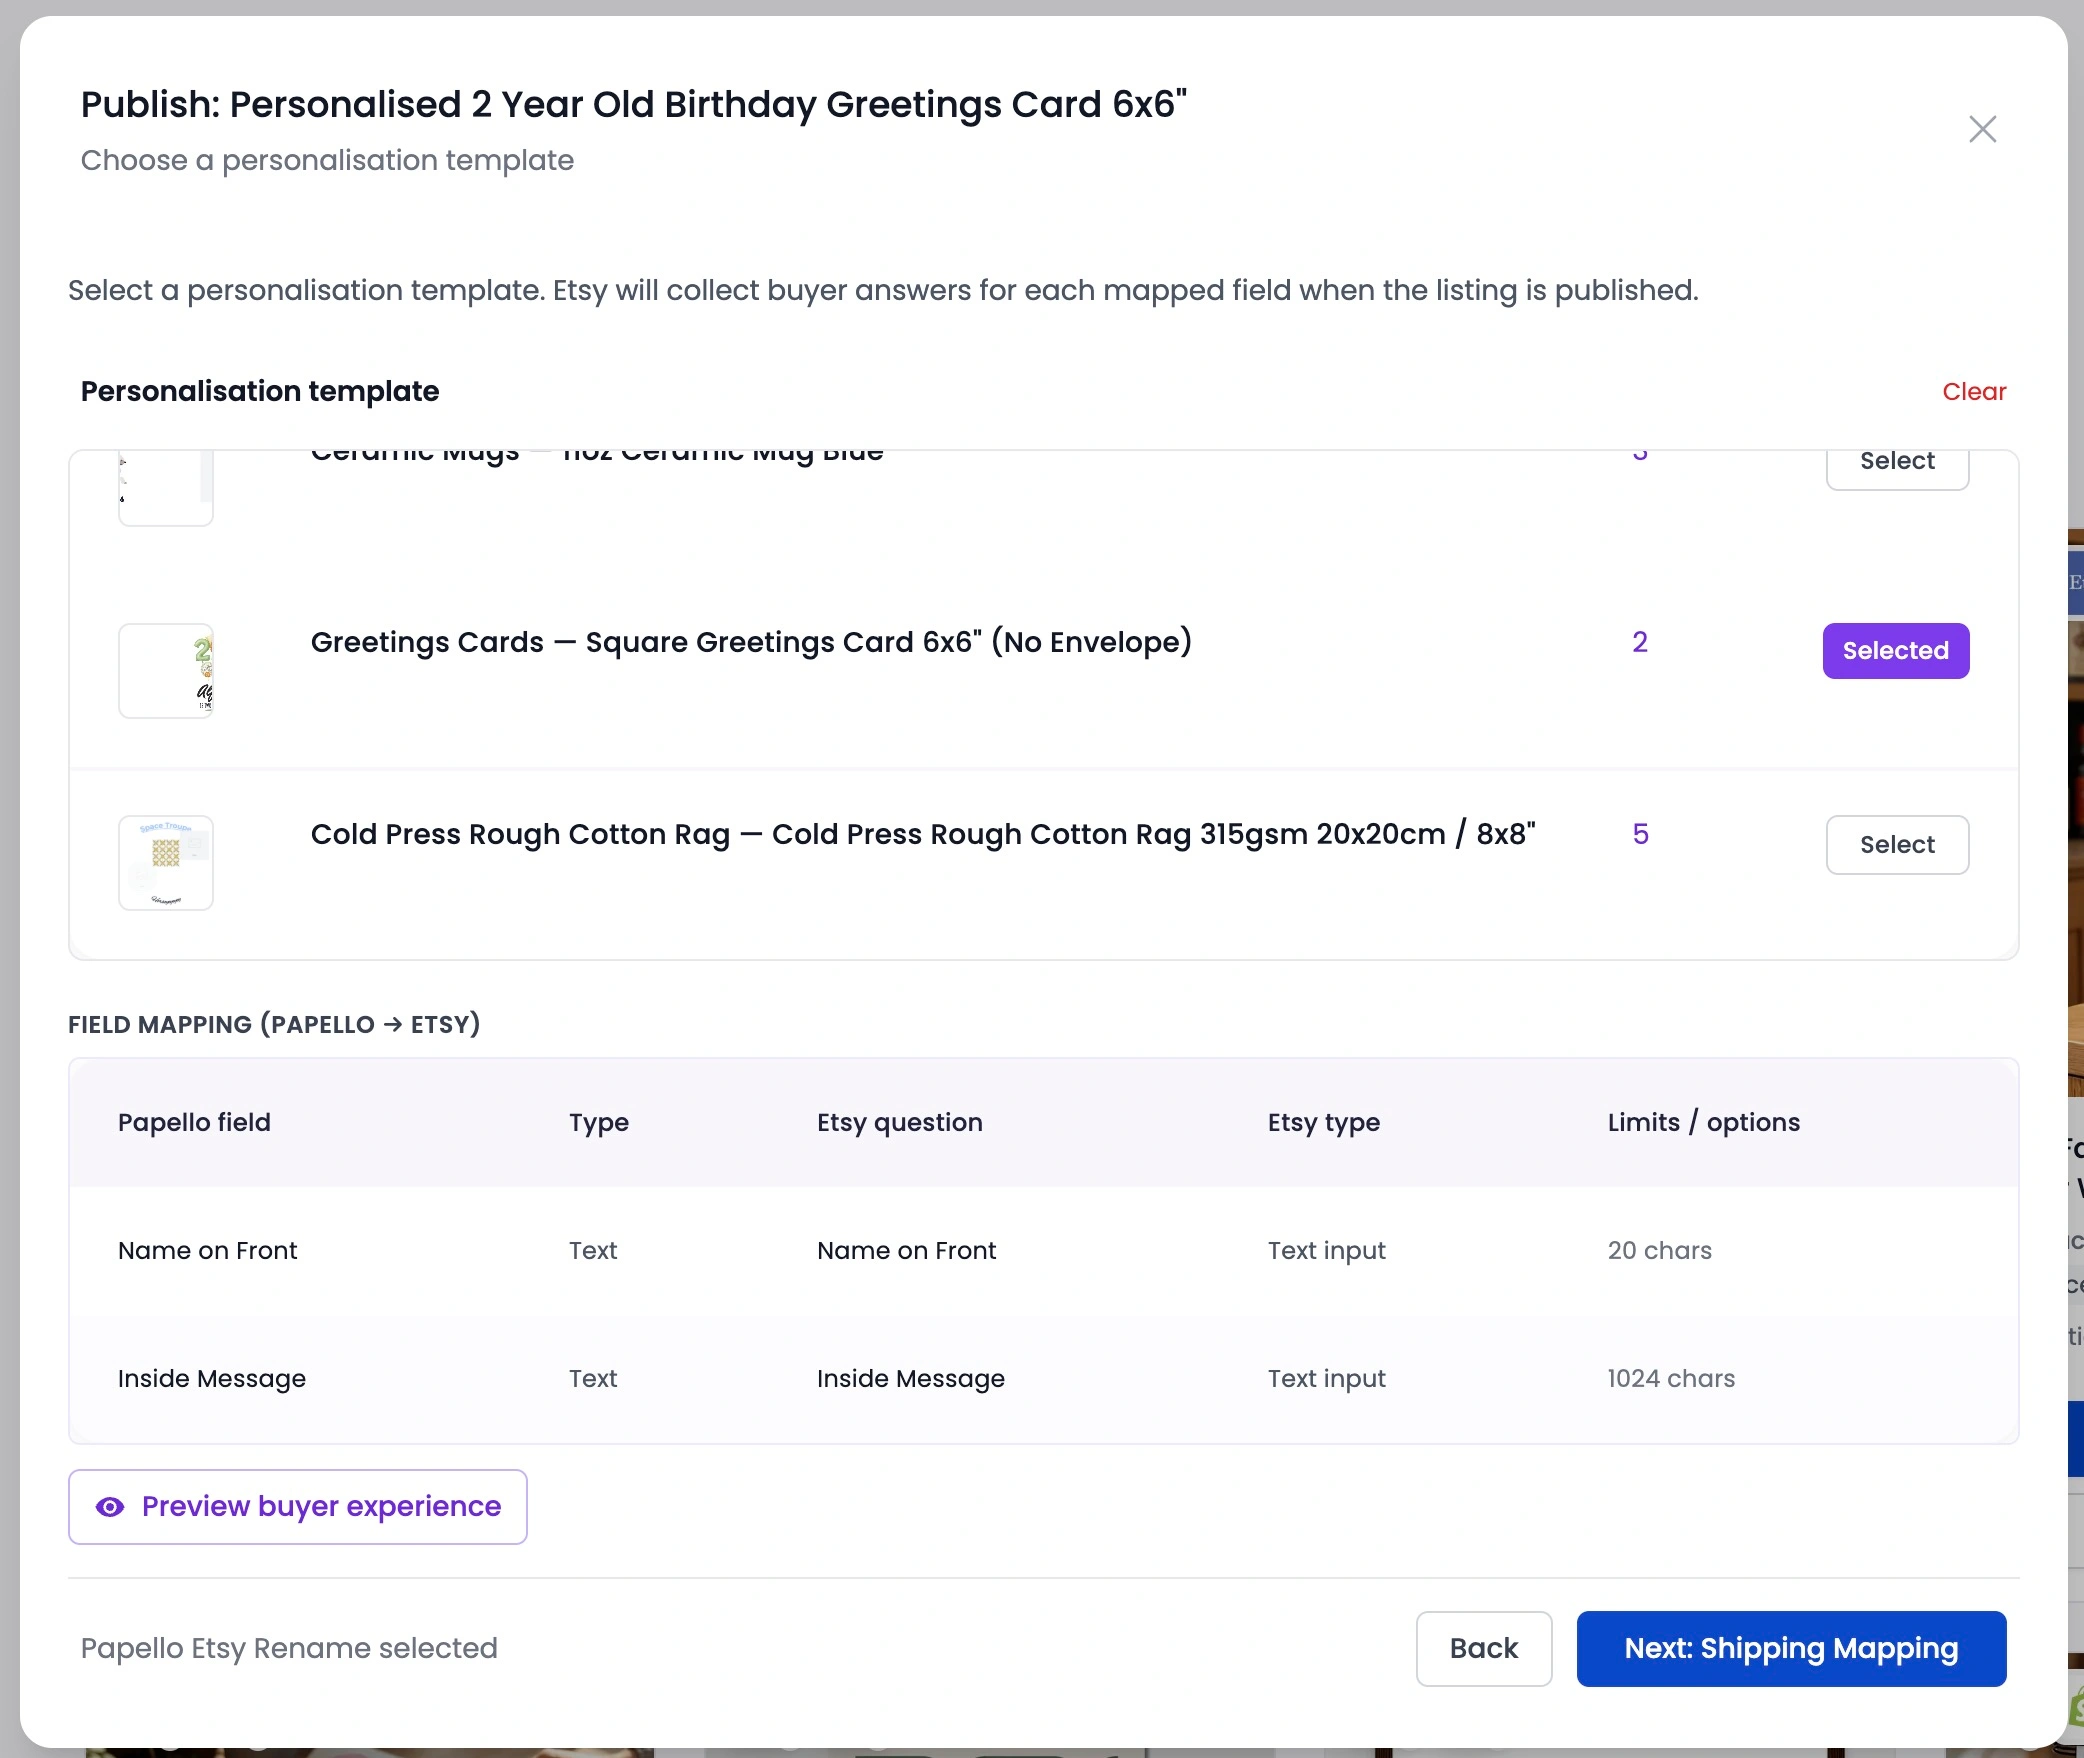
Complete your listing details and click Publish. Papello will push the product straight to your Etsy store, automatically generating and mapping all personalisation questions and inputs onto your live listing.
How to Automate Existing Etsy Listings
If you already have active personalised listings on Etsy with established sales history and reviews, you do not need to recreate them from scratch. You can attach Papello’s automation engine directly to live listings:
Connect your Etsy store to Papello.
Go to the Listings tab on your Papello dashboard and select your Etsy shop from the drop-down menu.
Find your existing listing and click Setup Automation.
Tick Personalised automation and pick the corresponding dynamic template from your Design Studio.
Papello will display an instant preview showing how your questions map across to the Etsy listing. Click Save Configuration.
Order Management & Fixing Customer Typos
Once live, incoming orders are processed according to your settings on the Account Preferences Page:
Automatic Submission: Artwork renders instantly and moves directly into production for zero-touch fulfillment.
Manual Approval (Recommended): Orders enter a "Pending Approval" status, and Papello sends an email alert so you can inspect rendered artwork before it goes to print.